It's that time of year, when the weather turns crisp and a young man's fancy turns to... fire! When we first bought our house, I was excited about a lot…
Using all-natural lime to whitewash a brick fireplace
Let’s be upfront about something: I’m not a big believer in tinkering with classic red brick. It’s generally beautiful – perfect, even? – just as it is. My friend Kirk put it best: “Even decent-looking classic brick is sort of unimpeachable.”
That said, some bricks are not the classic rusty red. There are tan bricks, for some reason, which look ok in rowhouse exteriors, but in most other instances… yeck. There are weirdly smooth and textureless bricks, or overly textured bricks, and all manner of weird hues or off sizes — and all of these, to me, just look kind of ridiculous.
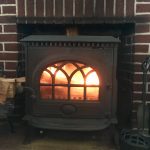
Which brings me to our brick fireplace and hearth. It looked… fine, but after nine years, two things about it kind of drove me crazy:
- Our bricks weren’t classic, rusty red; they were more maroon, almost purplish in spots. They were kind of dark and dreary — not all warm and charming like regular orange-red brick.
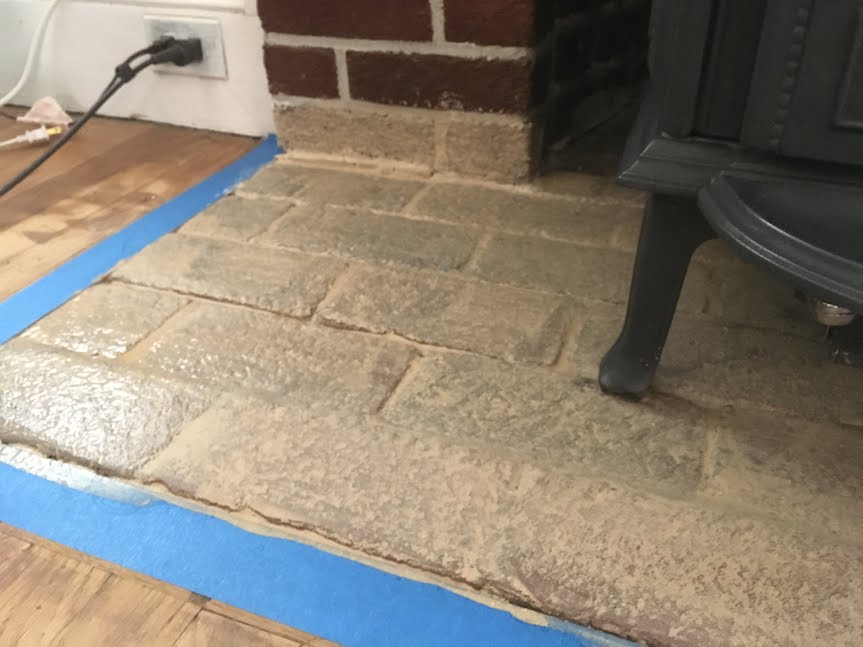
- Last year, I pulled up the gross slate tile that had covered the hearth floor for years, to expose the bricks underneath (that will get its own post eventually). But after being covered up all those years, those bricks didn’t match the ones up top anymore.
So I started looking into whitewashing the whole hearth – to lighten it up just a bit, and to give the top and bottom a uniform look.
Whitewash vs. limewash
I found a lot of examples online of people whitewashing brick fireplaces with diluted paint – but that kind of grossed me out, to be honest.
Painting brick just doesn’t seem right; like, they’re not even in the same class of materials. Once you apply paint to brick or stone, there’s really no going back. It’s just about sacrilege in my book.
I realized that what I really wanted was the faded, plastered look of whitewashed brick you’d see on an old English cottage — which is what you get from limewash. This is the age-old, natural method used to whitewash everything from Tom Sawyer’s fence to those postcard-perfect cottages you see in Ireland, Spain, and Greece.
Why lime whitewash endures
There are some good reasons people have been whitewashing with lime for centuries – and why you might want to use lime to whitewash your brick fireplace or exterior:
It’s all natural and environmentally friendly: It’s just slaked (or hydrated, meaning it’s been blended with water) powdered limestone, which dries into solid white calcite when it reacts with carbon dioxide. There are no VOCs or chemicals or anything else — like vinegar, it’s a powerful but extremely eco-friendly compound.
Lime is mildly antimicrobial: This makes limewash a good option for basement walls, barns, or anywhere you want to prevent mildew. (For my next project, I’m thinking I’ll slather this stuff all over our gross basement walls.)
It’s durable: Unlike paint, which just adheres to a surface and will peel or chip over time, limewash absorbs into a porous material like brick or concrete and actually hardens into it. (You can use it on wood, kind of, but it’s really meant for stone.)
However, on an exterior, limewash can gradually wash off over time – in rainy Ireland, you’d traditionally whitewash the walls twice a year if you wanted them to stay pristine white. Indoors, lime can sometimes leave a chalky residue if you rub up against it. But on a fireplace hearth that’s not really an issue, and it’s not going to wash off, either, unless you do it on purpose.
And I realized it was that washed-off, unevenly faded look — that reveals true red brick in some spots — that I was after:
After months of hemming and hawing, I finally decided to give it a go. It’s a pretty easy weekend project to tackle – here’s how.
Lime whitewash recipe
The recipe for a lime-based whitewash is easy:
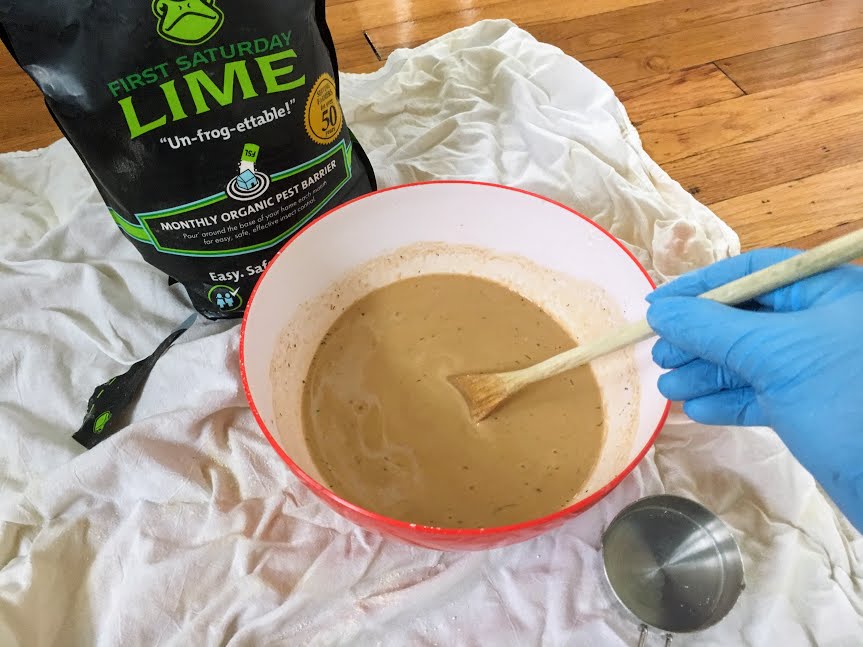
- 5 parts hydrated lime: Masonry lime is best, but harder to find; I used garden-variety hydrated lime — literally, it’s for gardens (lime can repel insects and rodents, and improve the pH of acidic soil) — and it came out fine.
- 1 part table salt: Good ol’ Morton’s salt will work.
- Water: Slowly stir in water until it’s the consistency of thin pancake batter.
Note: Lime is natural and nontoxic, but because it’s super alkaline (basic), it can be a bit caustic — so use a mask and gloves to avoid irritating your lungs or skin.
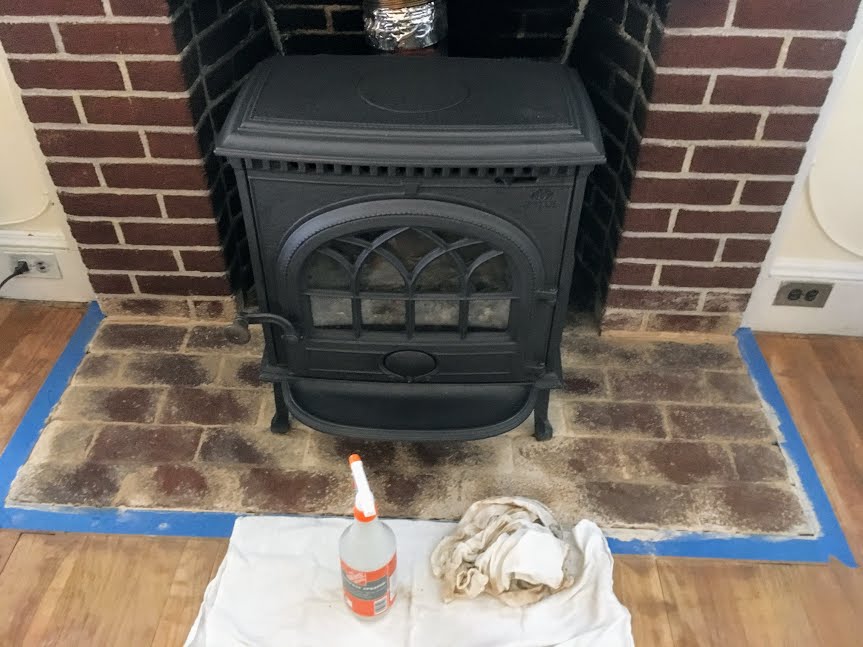
For the fireplace, I used 5 cups of lime, 1 cup of salt, and about 2-3 cups of water, stirring it all together in a big plastic bowl. And instead of using just water, I brewed a pot of black tea and let it cool — thinking I could get a bit of a sepia hue. The mixture went on looking like a gritty coffee milkshake, and it did tone down the brilliant white just a touch — but barely.
(Note: Ordinarily, limewash goes on grey, but dries much, MUCH lighter than when it’s wet — to a brilliant, pure white if you don’t tint it.)
I used black tea instead of water to get an off-white hue.
Limewash application
In addition to the whitewash mixture, you’ll also want to have a paintbrush, dust mask, gloves, a few damp cloths, and a spray bottle full of water on hand. Tape or cover any areas you want to protect, like wood floors (although you can wash off lime whitewash with soap and water quite easily).
First, mist the surface with the spray bottle – you want the brick to be a little damp as you paint it.
Then just brush on the limewash, pushing it into the nooks and crannies of the brick. This is quick work – but you’re not done yet.
It takes a long time to dry completely, which can be frustrating. But the thing I liked about limewash was that it lends itself to futzing.
If you want a thick coat of brilliant white, you’ll want to do two or three coats, letting it dry 24 hours in between each time.
But if you’d like a faded look, you can spritz it with water as it dries and wipe away some of the limewash in random spots to reveal spots of red brick:
In fact, even after the whole fireplace had dried completely, I went back and sprayed a few more spots and re-coated a couple of others — and then did it again, over the course of two days — until I was satisfied with the look. (You can keep your limewash solution on hand for a few days in an airtight container.)
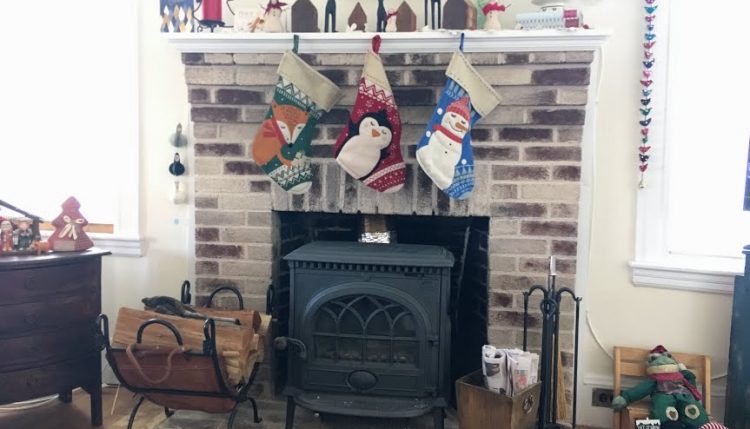
Here’s a before and after shot of our naturally whitewashed brick fireplace:
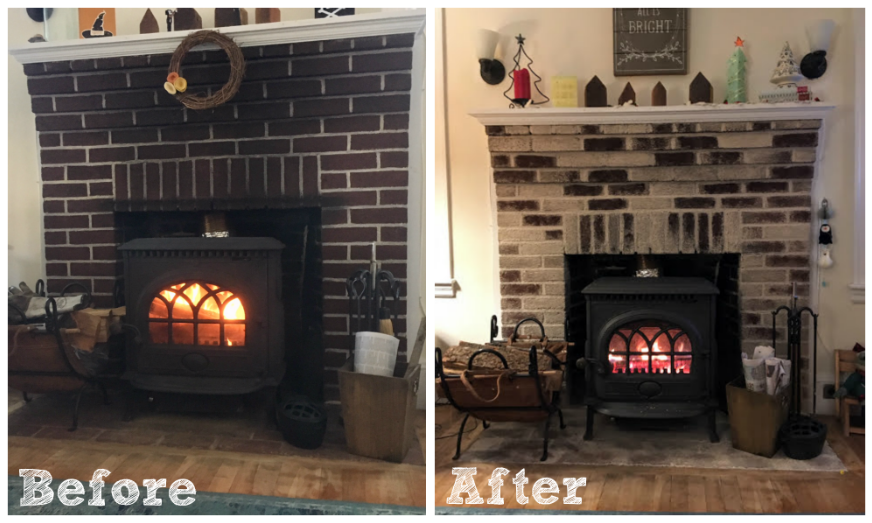
I’ll be honest, it took a few days to get used to it — I kept doing a double take when I glanced over at the fireplace. Now I kind of love the way it looks.
It’s so much lighter and brighter – we finally feel like we could choose a bolder or deeper color in our living room now without it feeling too dark. But it’s still very authentic looking: I simply can’t overstate how important it is to me that the chalky plaster look of lime whitewash looks more natural on brick than the plastic, rubbery look and feel of paint.
If you want to lighten up your brick fireplace (or any brick surface), try a lime whitewash. There’s a reason people have been doing it this way for centuries!
Related posts:
Jon Gorey • December 9, 2017