I'll admit it: I'm a garbage picker. On Sunday evenings I like to go for a jog or a walk through the neighborhood, and it just so happens that Monday…
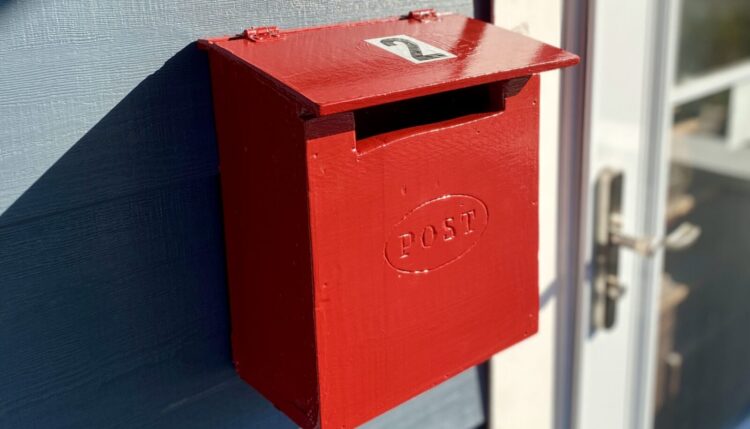
DIY mailbox: Build an British-style postbox with scrap wood
We recently got our siding redone, a whole upheaval that included, among other things, temporarily removing our mailboxes from the front porch. But after all was said and done — with our house finally looking nice for like, the very first time in our tenure — we decided the rusty old mailboxes we got at Home Depot a dozen years ago looked pretty ragged against our beautiful new blue siding.
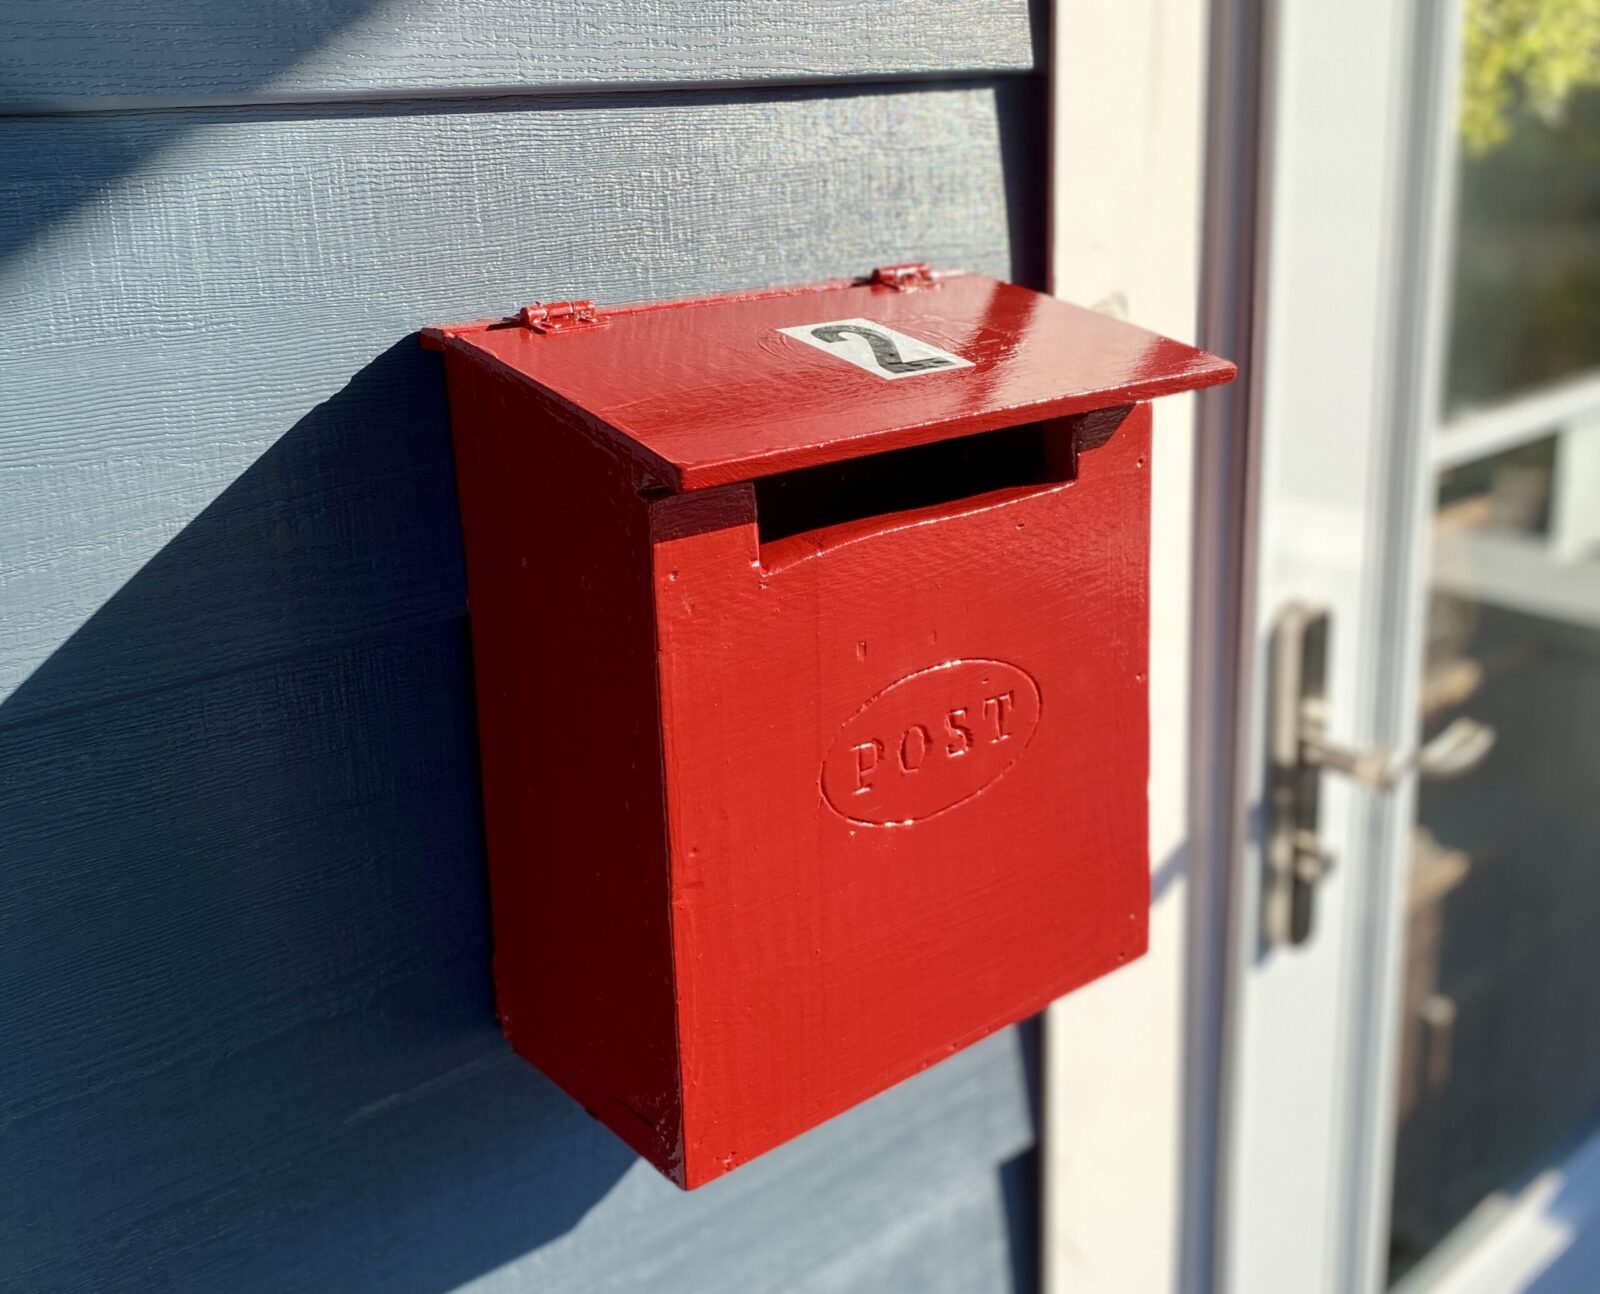
We wanted to get a British-style letterbox — or rather, a pair of them, as it’s a two-family house — in red, thinking it would look sharp against the blue wall. (We plan to paint the front doors red, too.) We found some nice looking distressed, embossed metal ones online, but they were like 40 bucks a pop!
You can probably see where this is going.
DIY mailbox: How to build a British-style letterbox from scrap wood
Our mailboxes are on our covered porch, so they’re not as exposed to the elements as ones on the street would be. So I got to thinking: Maybe I could just make them from scrap wood and paint them red? Spoiler: It worked!
Here’s what you’ll need for this DIY mailbox project:
- A pair of small, flat hinges (like this, but you only need two of them, not a 24-pack) with matching screws
- A miter saw (or circular saw) to make angled cuts
- Scrap wood (pallet wood works)
- Elmer’s wood glue
- Galvanized finish nails and 2-inch screws
- Screwdriver
- Drill
- Level
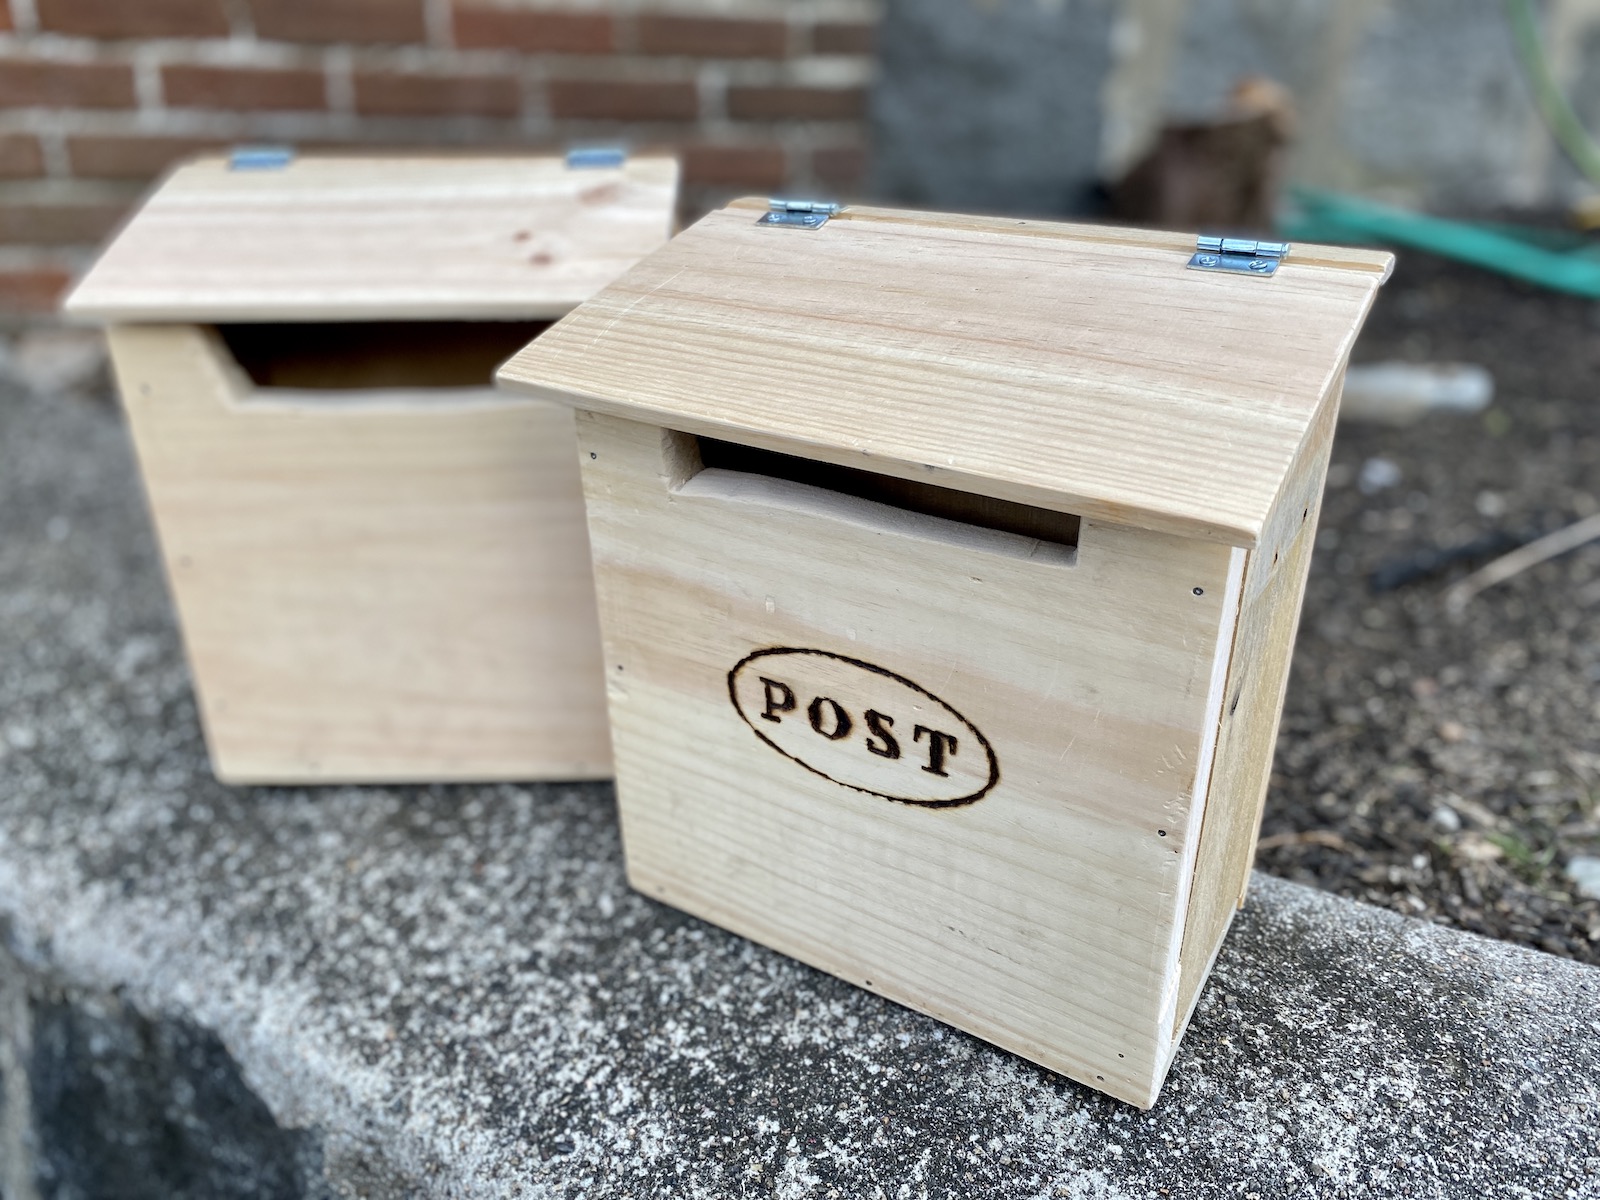
Step 1: Cut your wood
This letterbox has a front, a taller back, two matching sides, a bottom, and a top lid.
Front: The front should be about 8 to 10 inches wide, and roughly as high. I had a spare 1″ x 10″ board I trimmed for this purpose, but you could also just stack two or three pallet strips, which are about 3.5 inches wide, to make it either 7 or 10.5 inches tall. Let’s call it 10 inches wide by 10.5 inches tall.
Back: The back should be slightly taller if you want the lid to slope downward slightly. This helps shed water and snow, but on the porch it’s not entirely necessary. Mine is 12 inches high, but you could go up to 14 inches, stacking four pallet pieces.
Sides: The sides are 3.5-inch wide pallet pieces, cut to match each other. I cut mine to have a slight angle at the top: The short side is as tall as the front panel, and the higher end comes up to about a half inch below the back panel, to leave room for a lid.
Bottom: The bottom will be the same 3.5-inch width as the sides, tucked between them. (So if the front and back pieces are 10 inches wide, the bottom should be 10 inches minus the width of the two side pieces.)
Top: I found a slimmer piece for the lid, but you could also just use a matching piece of pallet wood.
Step 2: Nail and glue the frame together.
First, glue and nail the sides into the bottom, forming a U shape. Then, glue and nail the back panel onto that frame, hammering in from the back. (Galvanized nails resist rusting.)
Finally, glue and nail the front panel on, hammering in one nail every few inches along the edge.
Step 3: Attach the top with hinges.
Screw one side of each hinge into the top piece, spacing each one an equal distance from the edge (about one or two inches in).
Line up the lid, and screw in the other side of each hinge. Start with one screw and make sure it opens and closes smoothly before adding and tightening the second one.
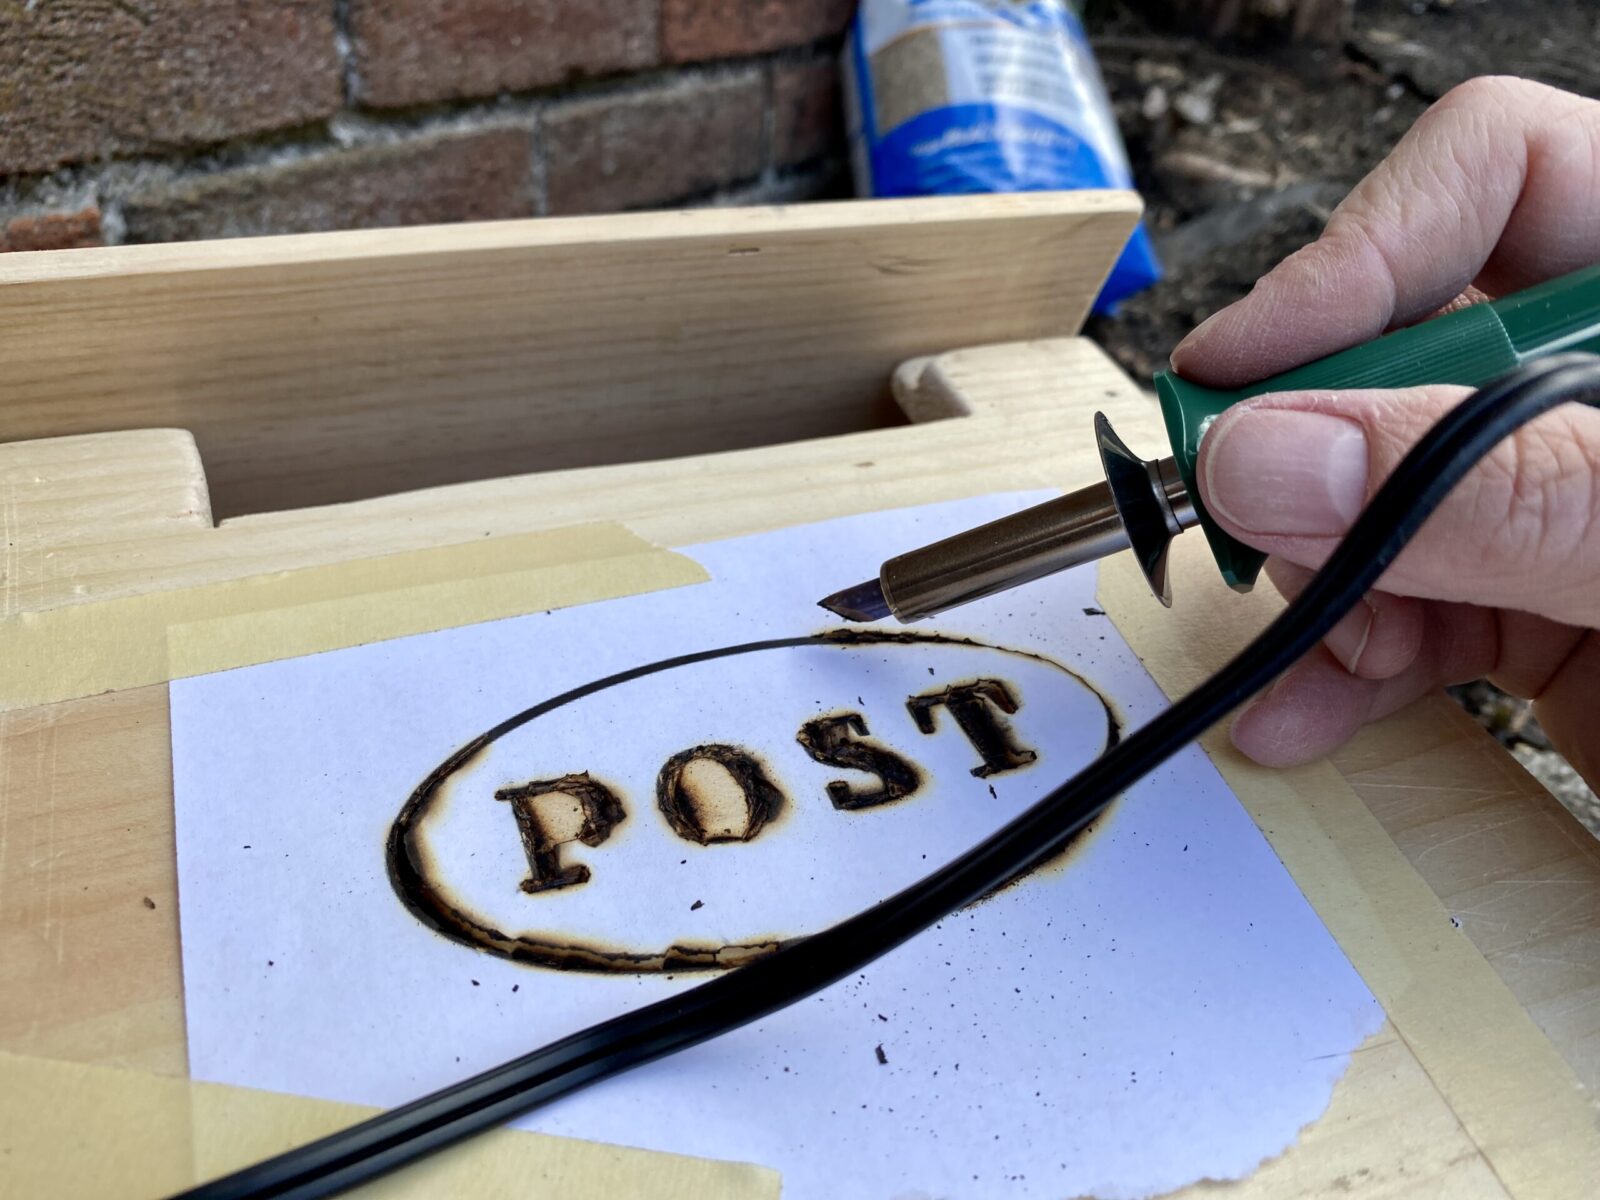
Step 4 (optional): Cut a mail slot and imprint ‘Post’ on the front.
I used a jigsaw to cut out a letter slot from the front panel, right beneath the lid. Truthfully, it came out pretty ragged, but some heavy sanding smoothed it out. I like the look, but this is very much optional. (Alternatively, you could simply cut your front panel an inch shorter than the sides to create a similar gap.)
Then I used a wood-burning tool to imprint the word “Post” on the front. To make a stencil, I printed out the word inside an oval, in a font I liked, and taped that to the front panel. (Measure carefully to make sure it’s centered.) Then I pressed down with the tool to scorch the design into the wood.
It actually looked really cool unfinished! Once I painted over it, it appeared as a more subtle imprint, which I like, too.
Step 5: Sand, prime, and paint.
Give the whole thing a good sanding — you don’t want you or your mail carrier getting a splinter!
Then give every surface, even the inside, two coats of primer. After that, apply a couple coats of exterior paint. I used Rustoleum Colonial Red.
Step 6: Affix your DIY mailbox to the wall.
Drill a pair of holes through the back panel, using a 1/8″ or 3/16″ drill bit.
Then, mount the mailbox to the side of your house using 2-inch galvanized screws. Screw in one side first, and then place a level on top of the letterbox to make sure it’s straight before drilling in the second screw. I finished ours off with Apt No. stickers on the top. I should have made a little flag, now that I think of it, to indicate something is ready to be mailed! Ah well.
Related posts:

Jon Gorey • August 10, 2022