
A few years ago, we did a budget remodel of our gross, outdated kitchen. You can read about it here in detail, but here's a before-and-after shot to provide a visual summary: During our…
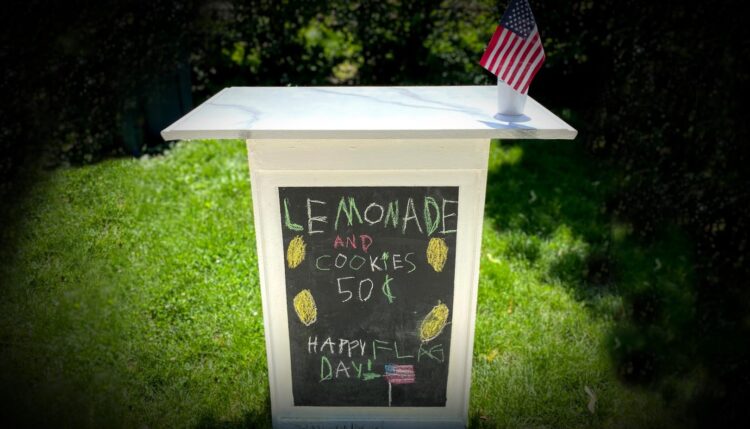
How to make a DIY lemonade stand from an old kitchen cabinet
There’s something pretty all-American about kids selling lemonade on the sidewalk on a hot summer day. And yet, a lot of modern American communities — I’m talking about those car-centric cul-de-sac suburbs off the highway — just don’t lend themselves to this smallest of business enterprises.
That’s one of the reasons we think Quincy is one of the best places in Boston to live: It’s super walkable. I don’t just mean that there are sidewalks and safe crosswalks and street trees, all of which are essential. But for a community to truly be walkable, according to urban planner Jeff Speck’s wonderful book “Walkable City,” there also has to be stuff of interest to walk to.
In Quincy, there’s a Flag Day parade and fireworks display every June (I suspect the city at some point must have conceded defeat in trying to compete with Boston’s epic July 4th celebration), and dozens of people walk past our house on their way up to the parade route.
So a couple of years ago, our daughter decided to set up a lemonade and cookie stand in front of our house, to see if she could make a few bucks. (She did. It was a big hit, and she’s done it every year since, except for 2020.)
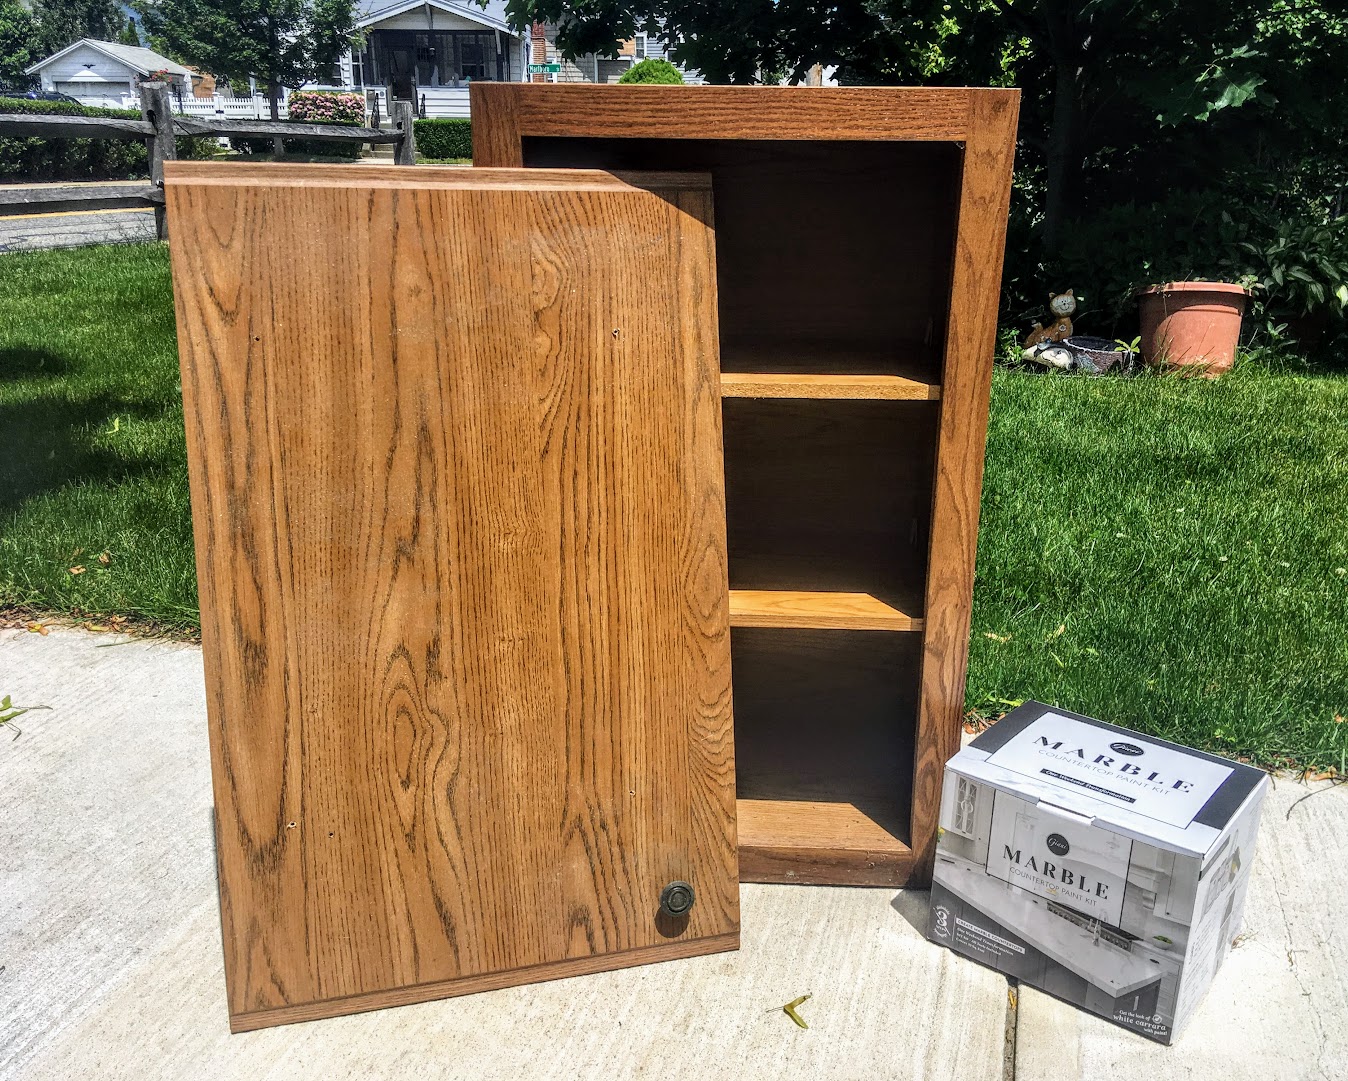
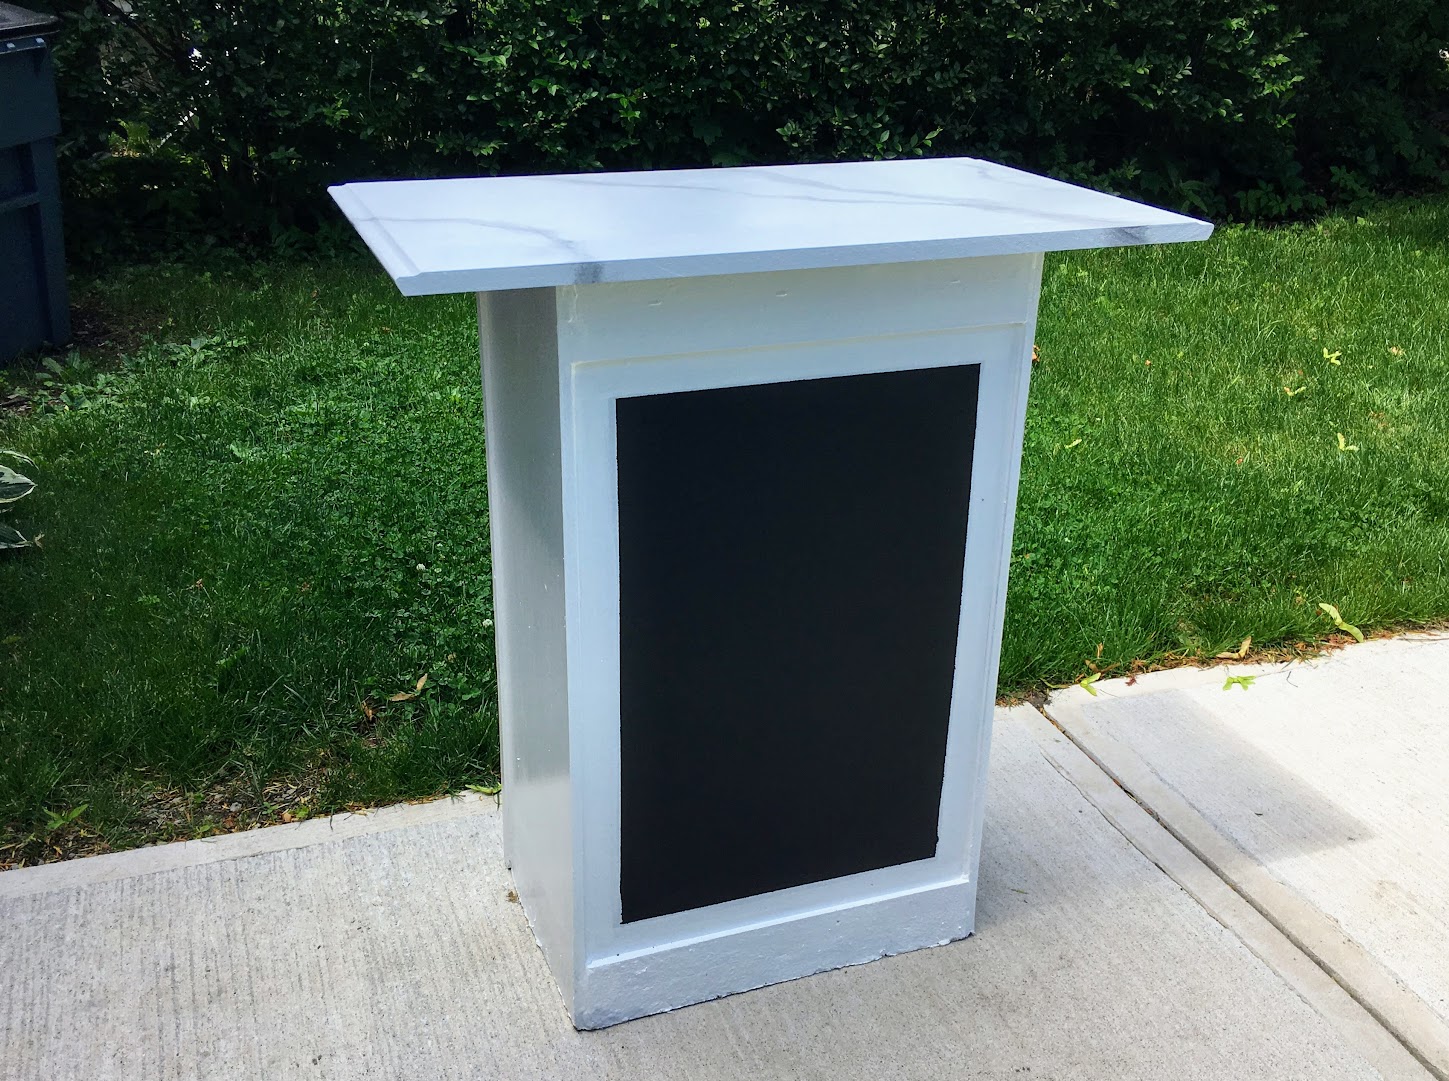
Of course, any old folding table will work to sell lemonade. But we had an old kitchen cabinet in the garage, and my editor at the Globe had just asked me to try out some faux marble countertop paint to see if the stuff really worked. So I figured I’d make a dedicated DIY lemonade stand from the old cabinet — which means it has a storage cubby and shelf for supplies and a change box — with a fancy faux marble top. (Come to think of it, I probably should have added wheelie coasters and made it a lemonade cart!)
Note: This project works best with a leftover wall cabinet, as base cabinets are generally too deep. You can also just use a piece of plywood for the top if the cabinet door isn’t in good shape.
Materials for a DIY lemonade stand:
- 15″- or 18″-by-30″ wall cabinet
- Exterior paint and primer
- Chalkboard paint
Step 1: Detach the door and remove hardware.
Cabinets generally don’t have great top surfaces — base cabinets are typically open up top, awaiting a countertop, and wall cabinets often have a flimsy top or a deep tray up there. But the cabinet door makes a fine tabletop if you prep it a bit. Unscrew the hinges on both the cabinet and the door, and save them in your Jar of Random Hardware. Remove the handle, too.
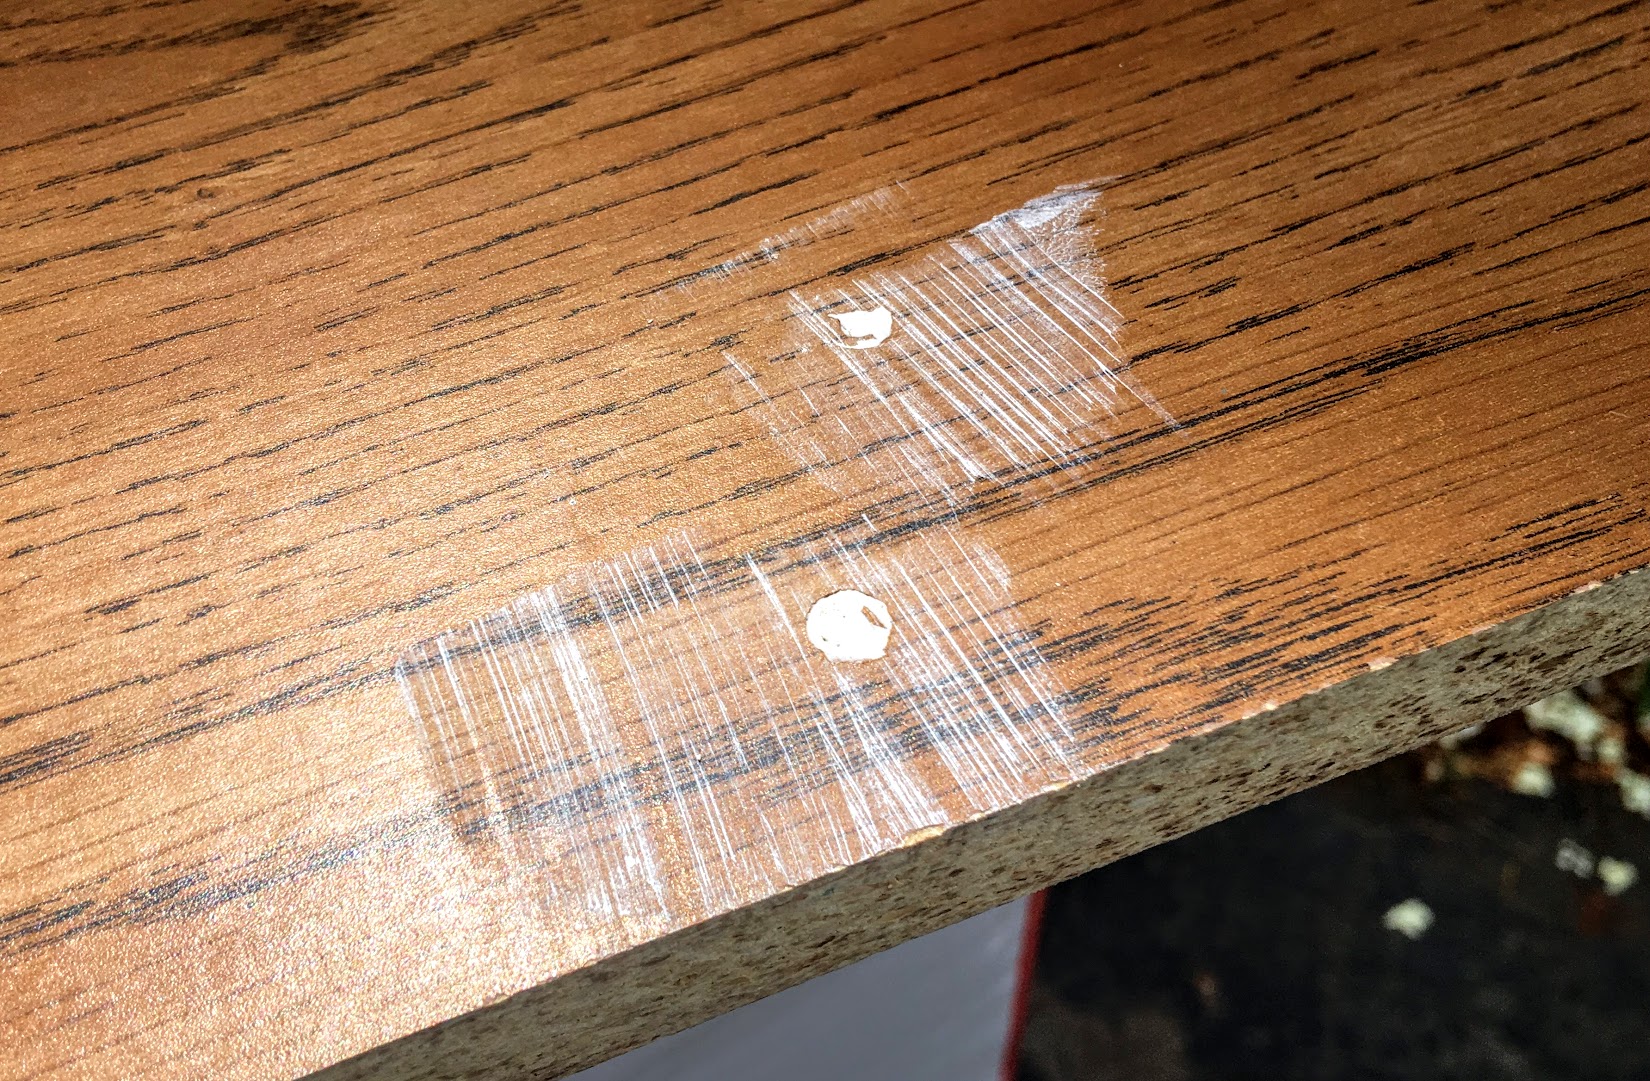
Step 2: Trim the door edges and fill any holes (if necessary).
Our cabinet door had cut-outs where the hinges had been, so I used a circular saw to trim about an inch off that side to get a nice clean edge. There were also some big holes where the door handle had been, so I mixed up some wood putty and filled those in. Just use a bit of sandpaper to smooth off the excess once it dries.
Step 3: Secure the door to the top of the cabinet.
With the flattest side of the cabinet door facing up (that might be the interior side), center it over the top of the cabinet frame and fasten it down with screws or nails. (It’s always good to drill a pilot hole if using screws.) I used some wood glue, too.
Step 4: Prime the whole thing.
If the cabinet has been in a garage, basement, or curbside trash pile, it’s a good idea to wash it down before priming it. Once it’s dry, apply a coat of exterior primer/paint combo. Let that dry, then apply a second coat.
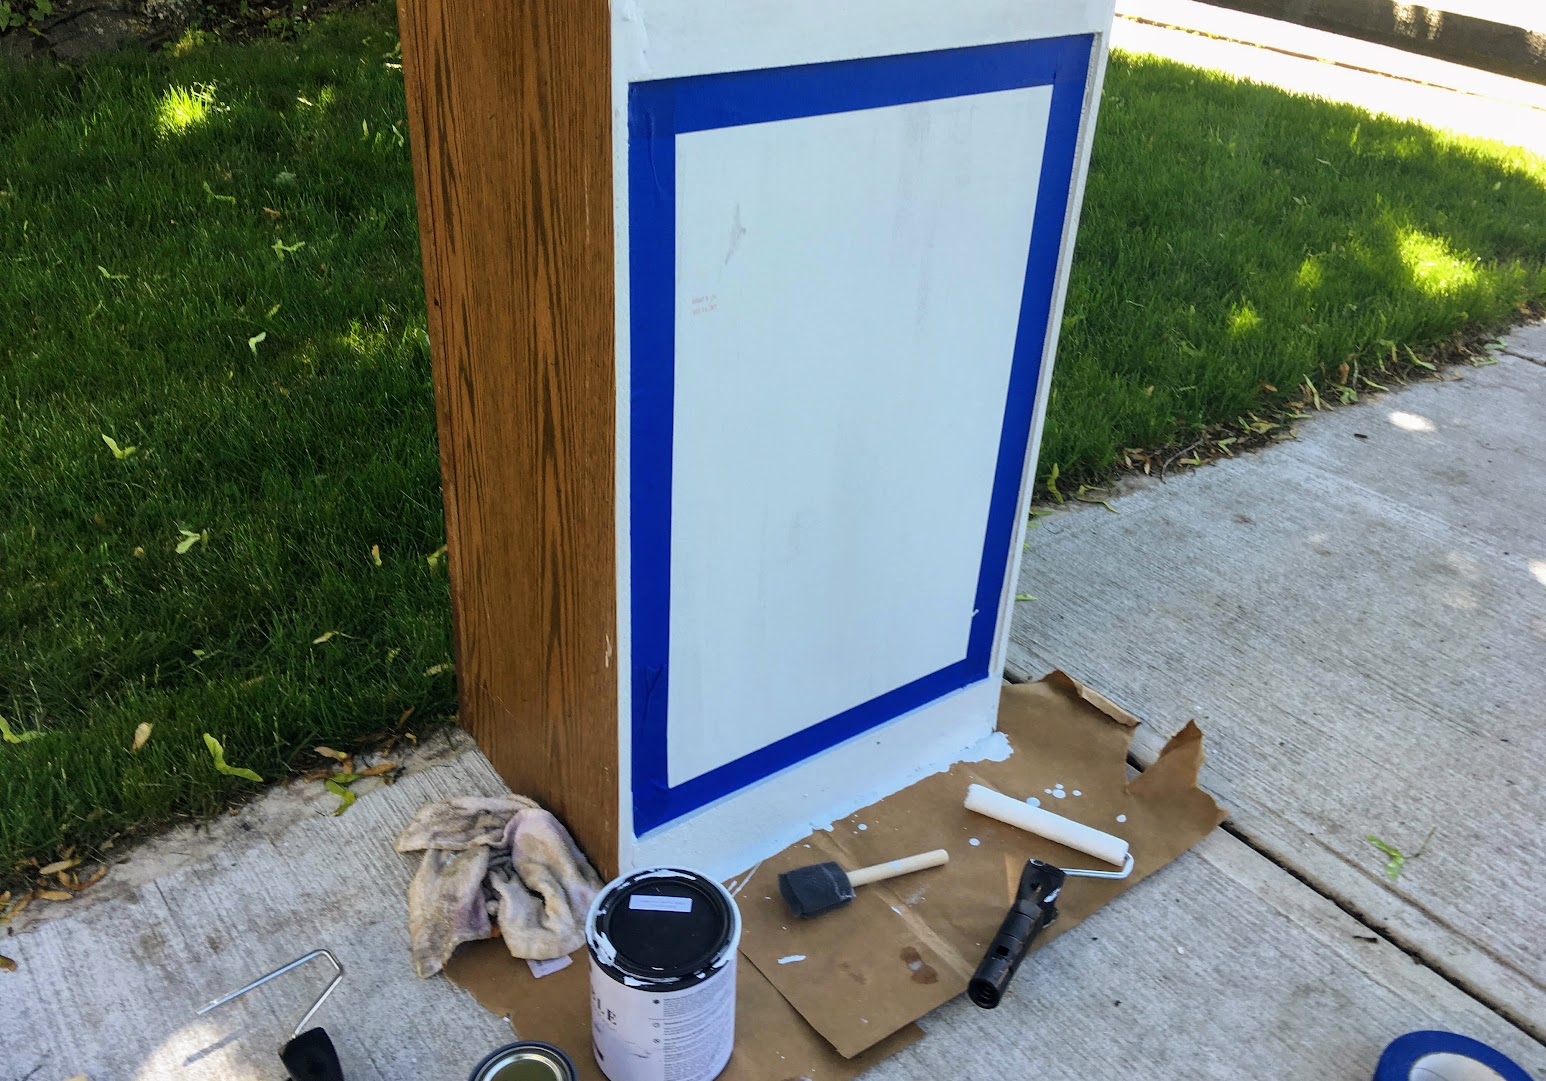
Step 5: Paint a chalkboard.
The back side of a cabinet frame isn’t meant to be seen, just to face the kitchen wall — so it’s not exactly pretty, even under a coat of paint. But it can be made useful.
Frame out a rectangle with masking tape, and give it a coat of chalkboard paint, followed by a second coat. Now your kid can write out what’s for sale, how much it costs, and decorate the menu.
Step 6: Set up shop!
Since I was getting paid to test out this marble counter paint kit, I gave the stuff a whirl. All it really takes to achieve the marble effect is loosely running some gray paint in “veins” with a thin artist’s brush, and sponging a little water on it in spots. Then there’s a clear coat that goes on top to give it a waterproof sheen.
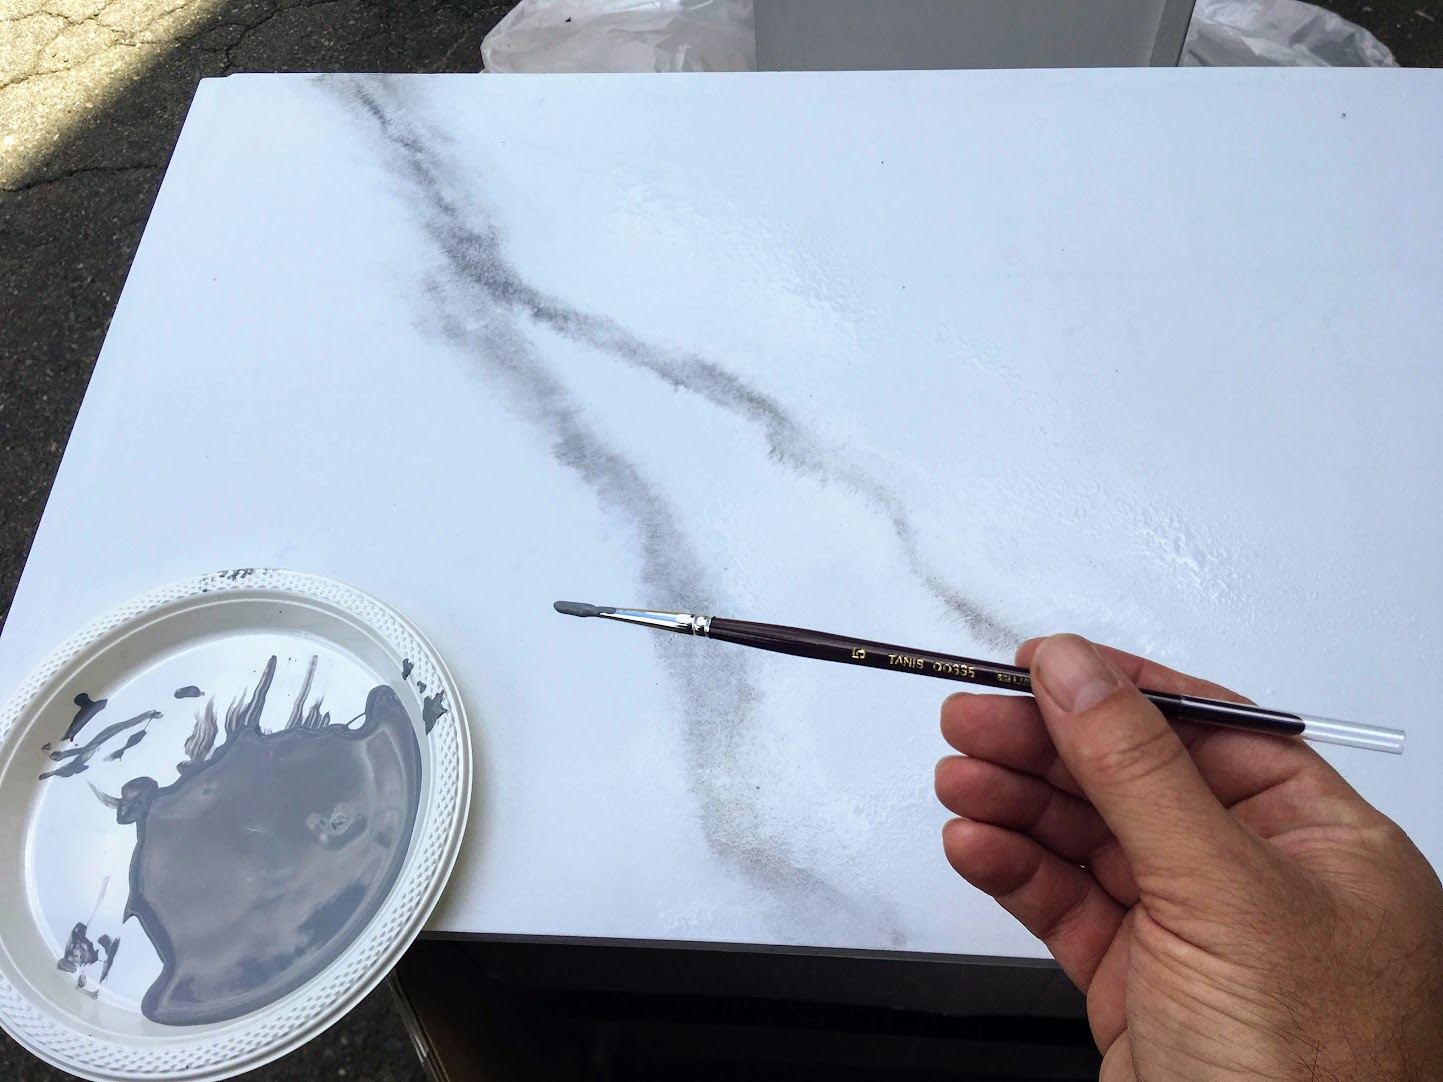
While our painted faux marble countertop actually came out pretty well — it really does deceive from a distance, although it’s quite clearly not marble once you get up close — it’s wholly unnecessary. A plain white top works just fine.
Help your kid whip up a pitcher or two of lemonade, stock the inside of the stand with some cups and a change box, and let them start selling!

Simple Homemade Lemonade Recipe
- 1 cup lemon juice (about 6-8 fresh squeezed lemons)
- 1 cup sugar
- 1 cup warm water
- 1 1/2 quarts of water
- Ice
- In a pitcher, mix the sugar and warm water and stir until the sugar is fully dissolved. (Never pour boiling water into a glass pitcher, it’ll break on you!)
- Add lemon juice, cold water, and ice, and mix well. Voila!
Related posts:


Jon Gorey • April 27, 2022