We recently got our siding redone, a whole upheaval that included, among other things, temporarily removing our mailboxes from the front porch. But after all was said and done —…
DIY record player stand and using relative measurements
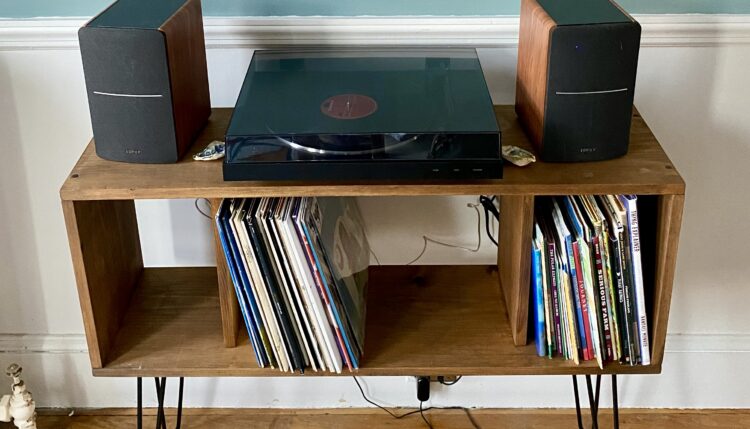
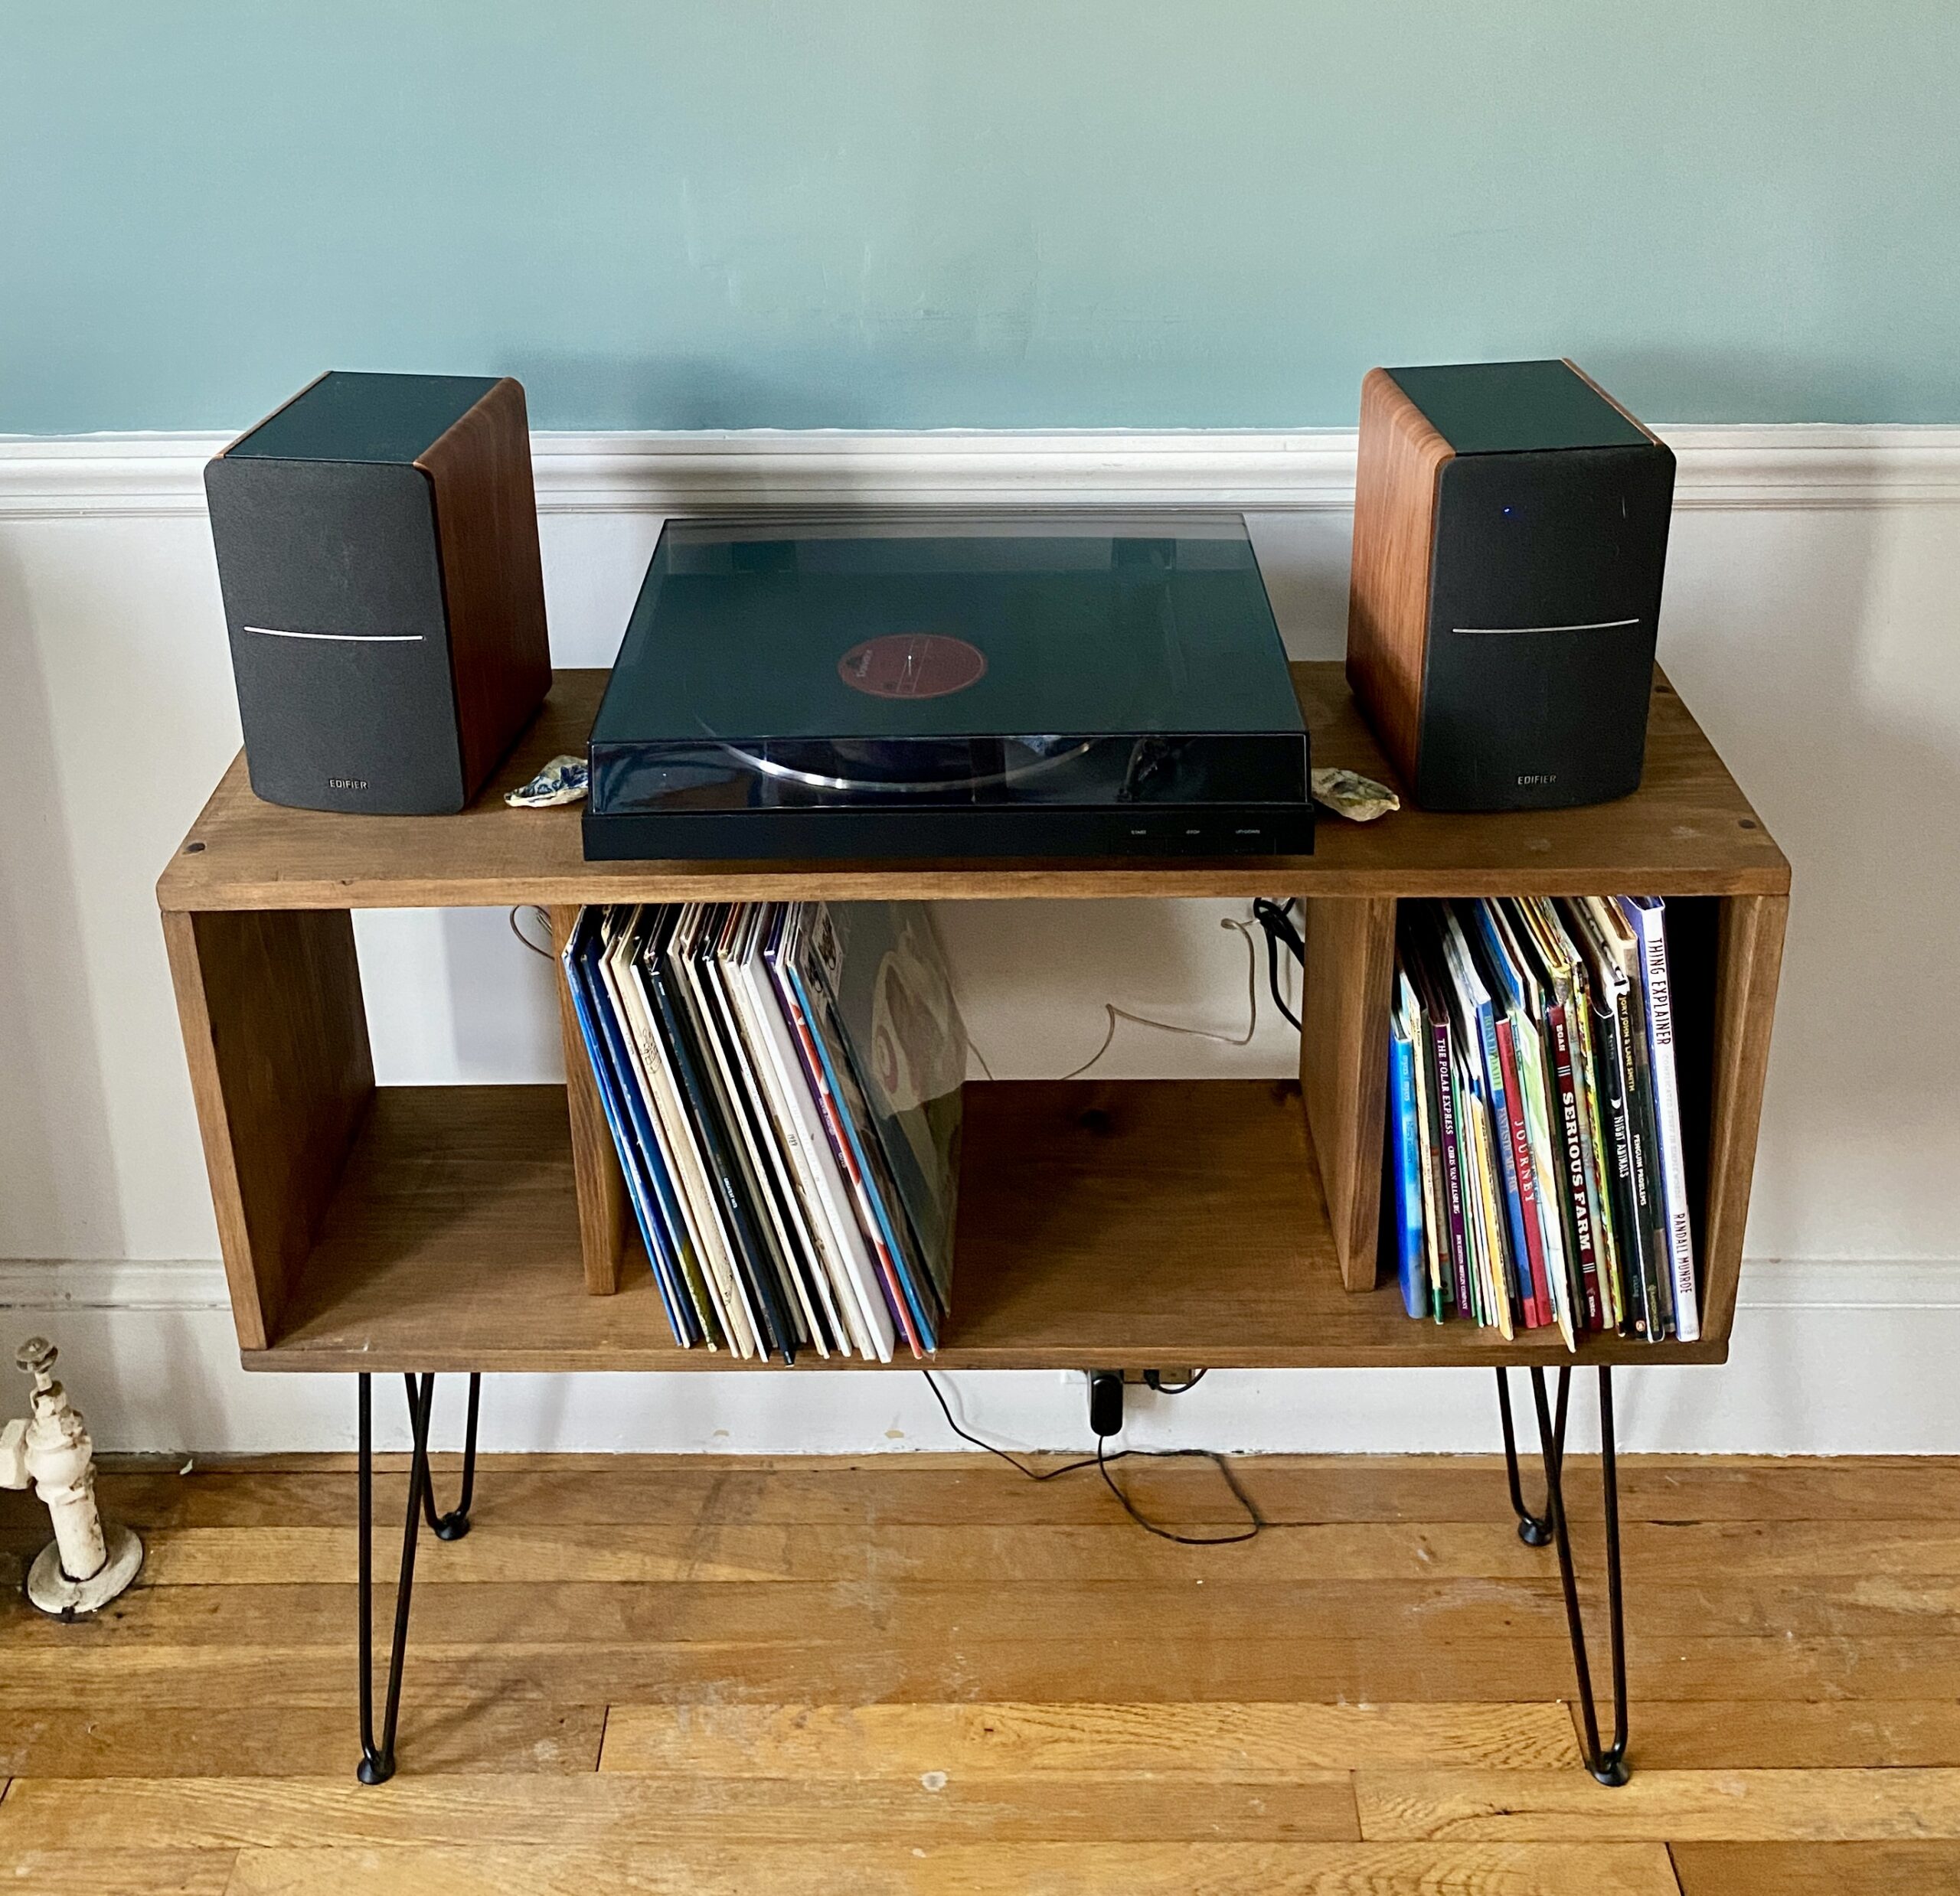
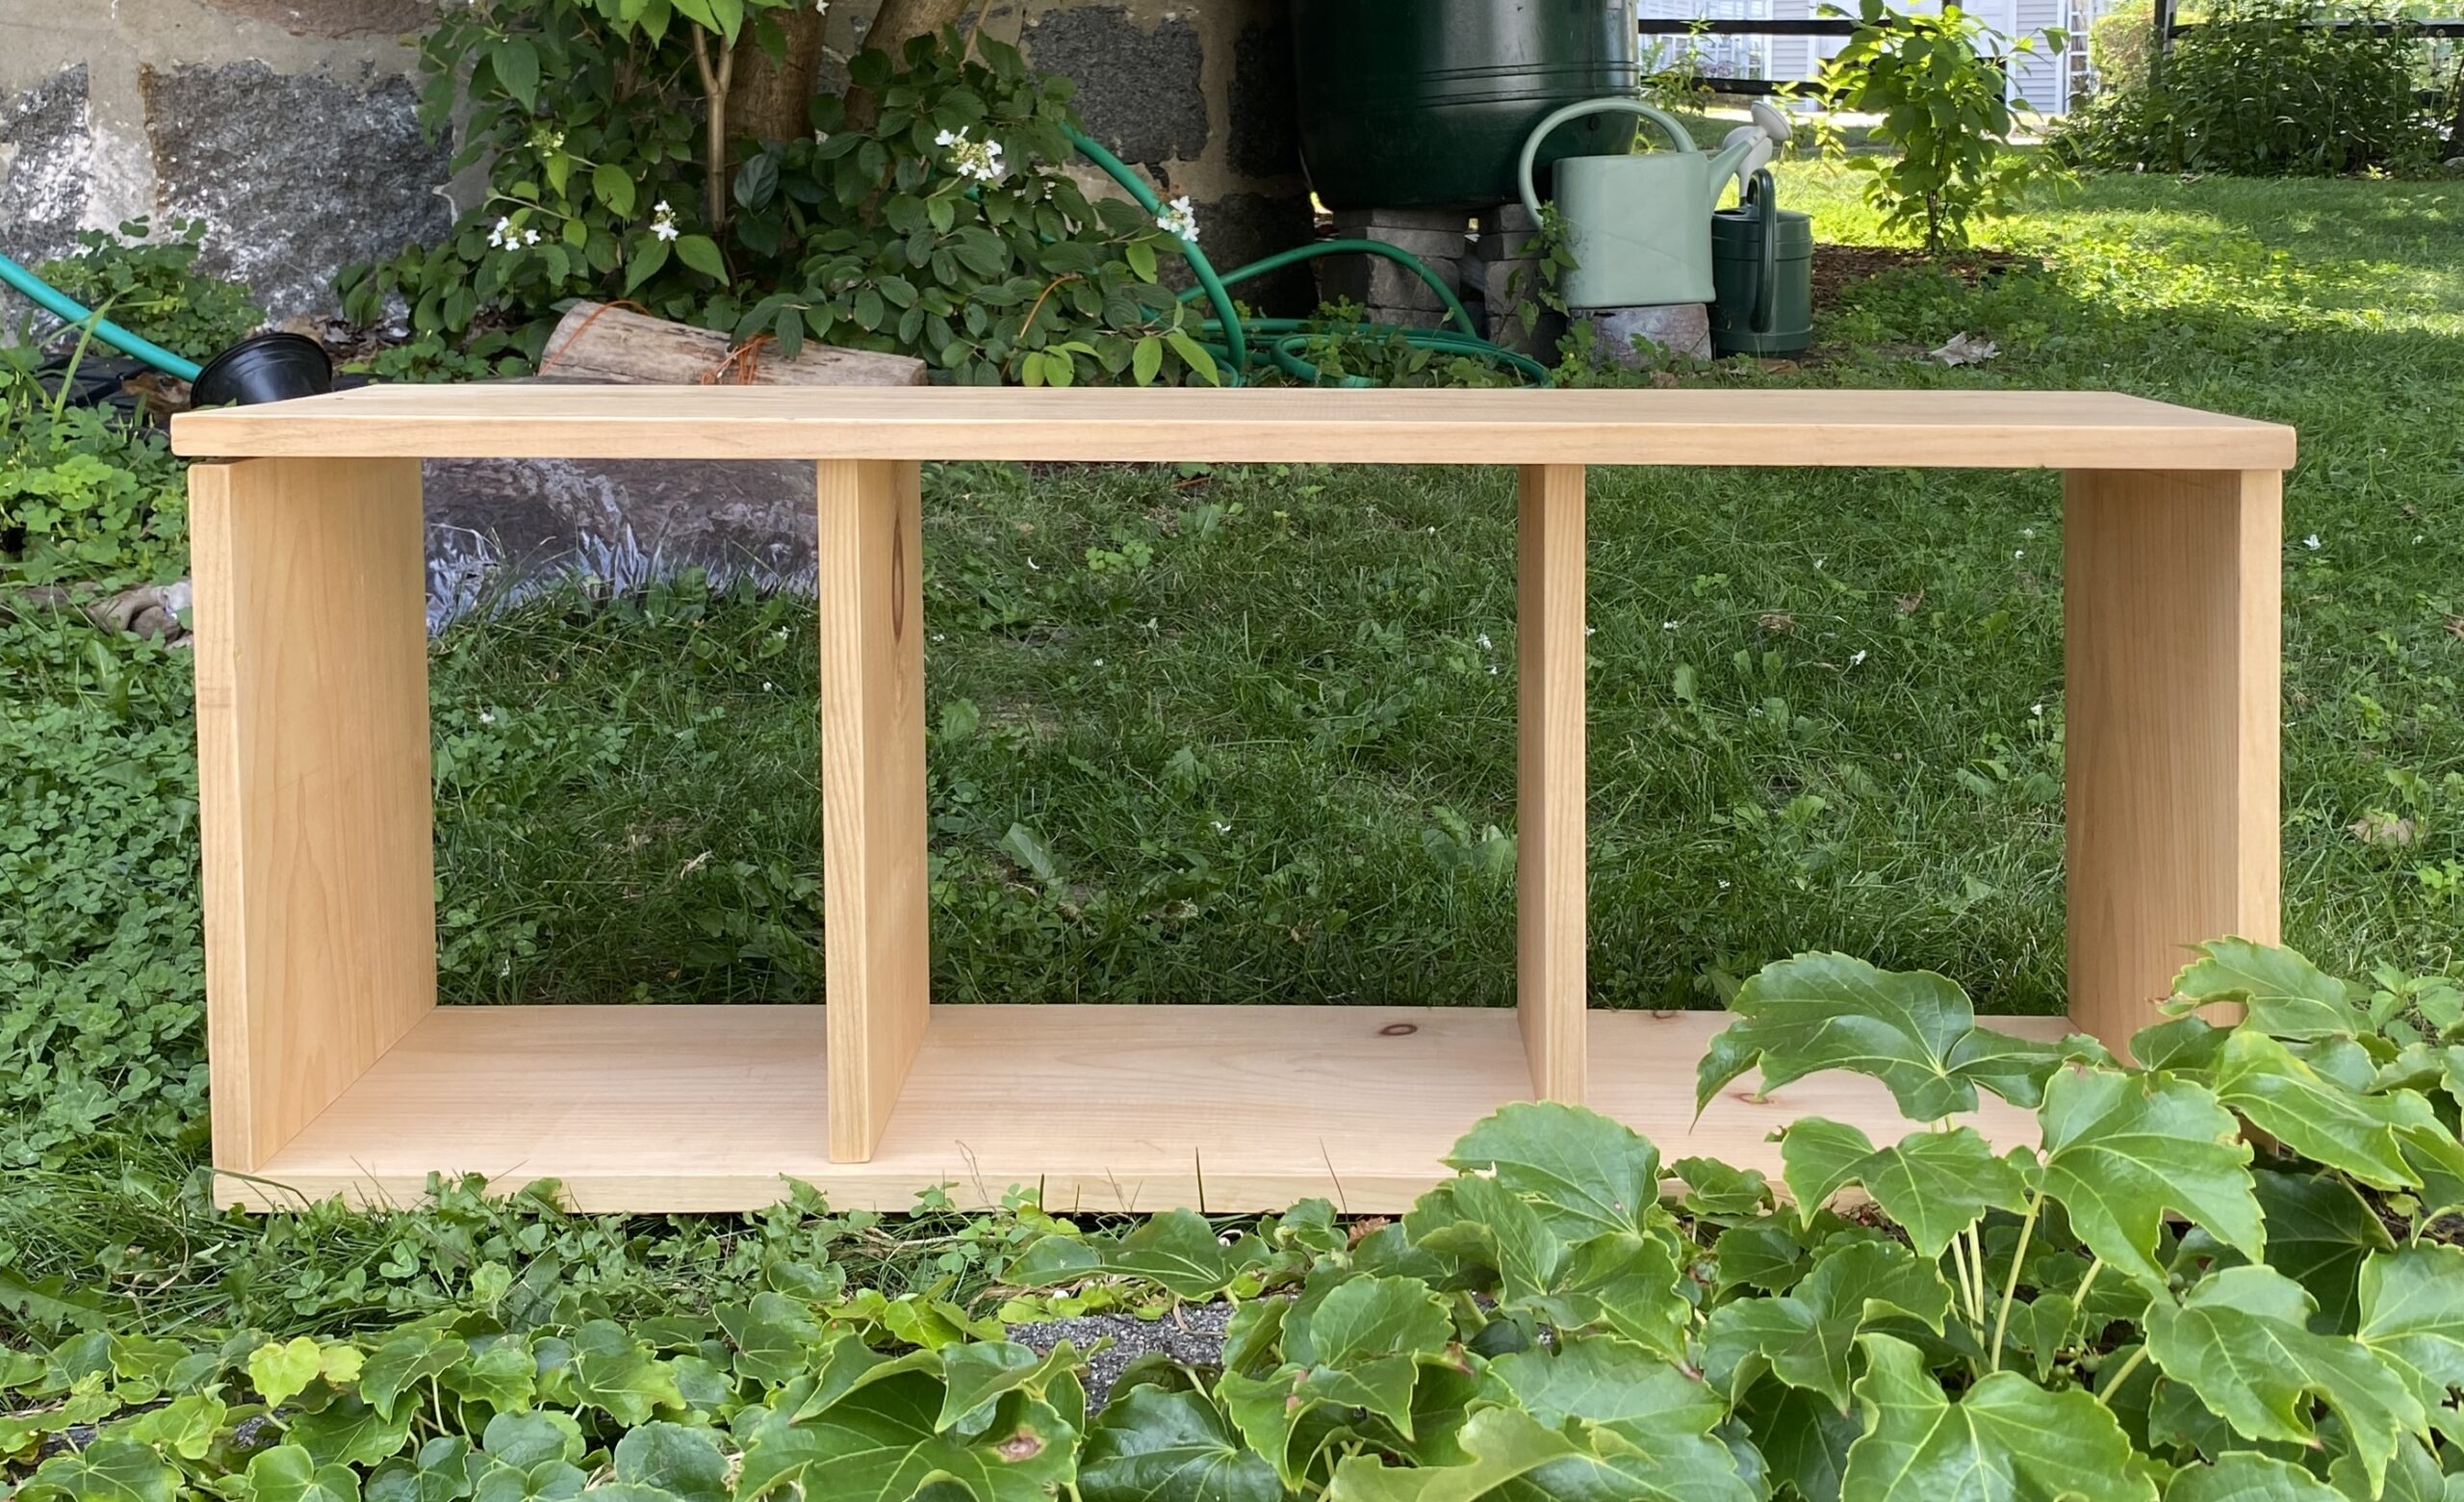
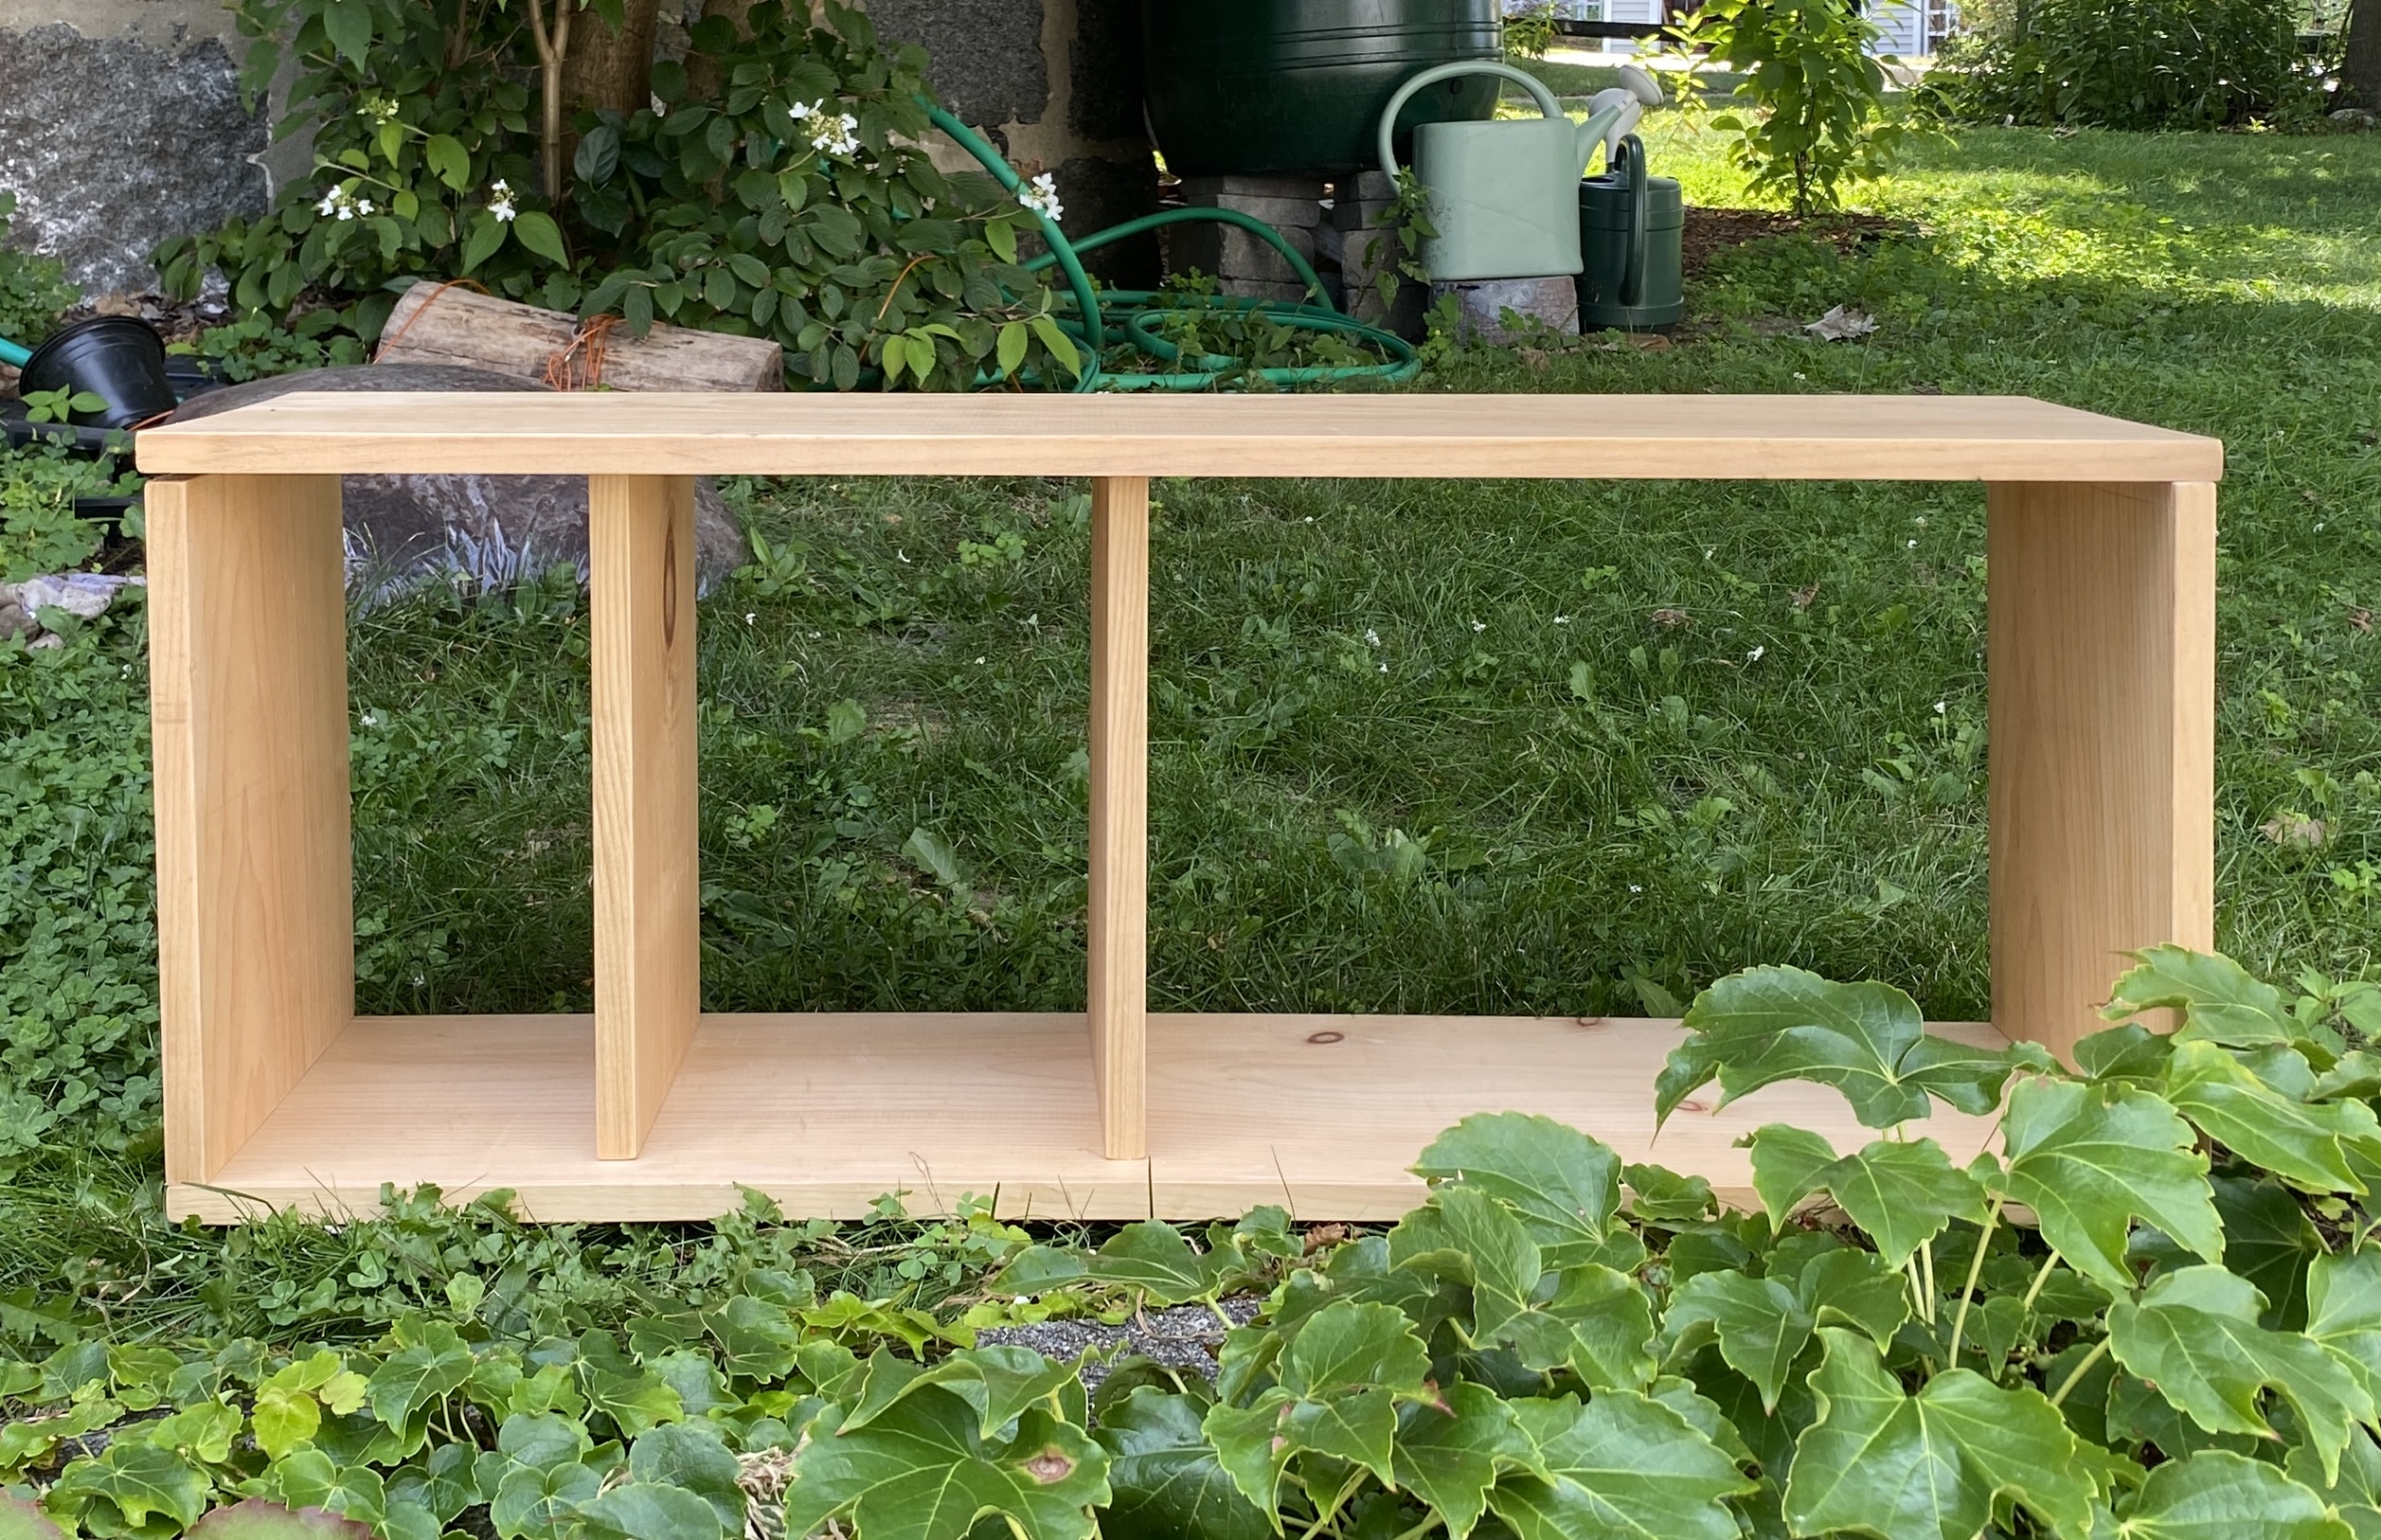
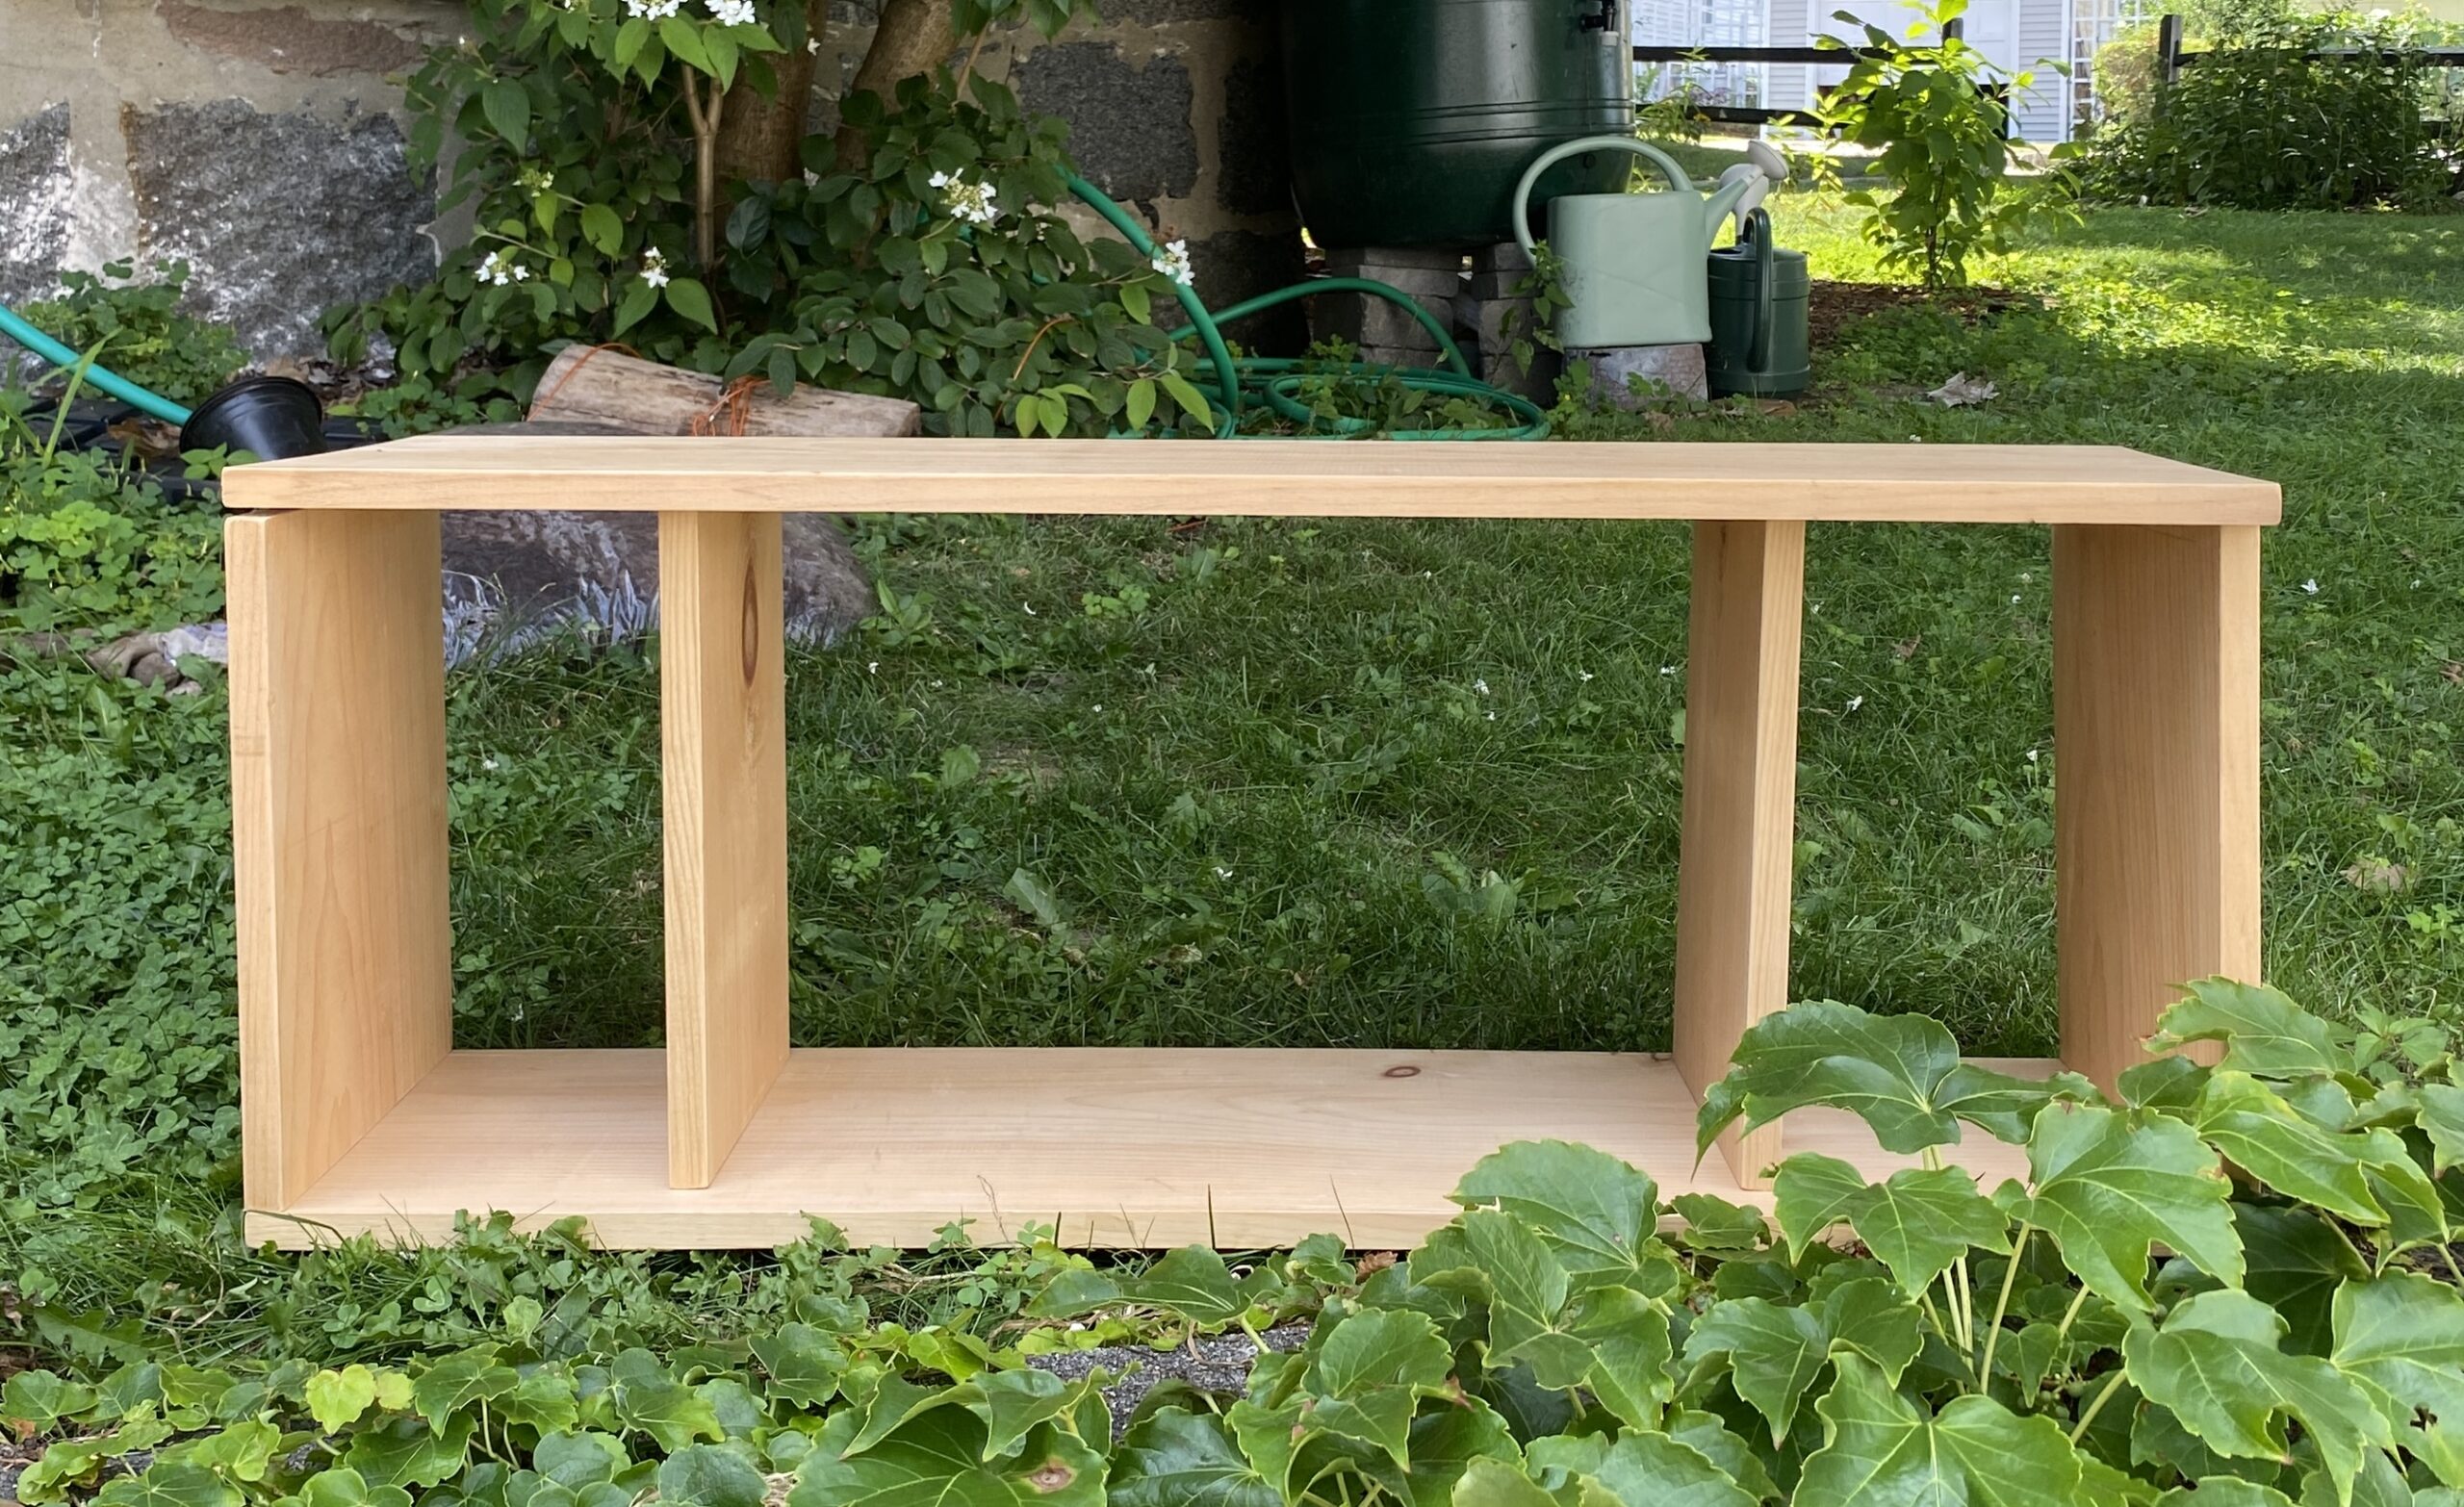
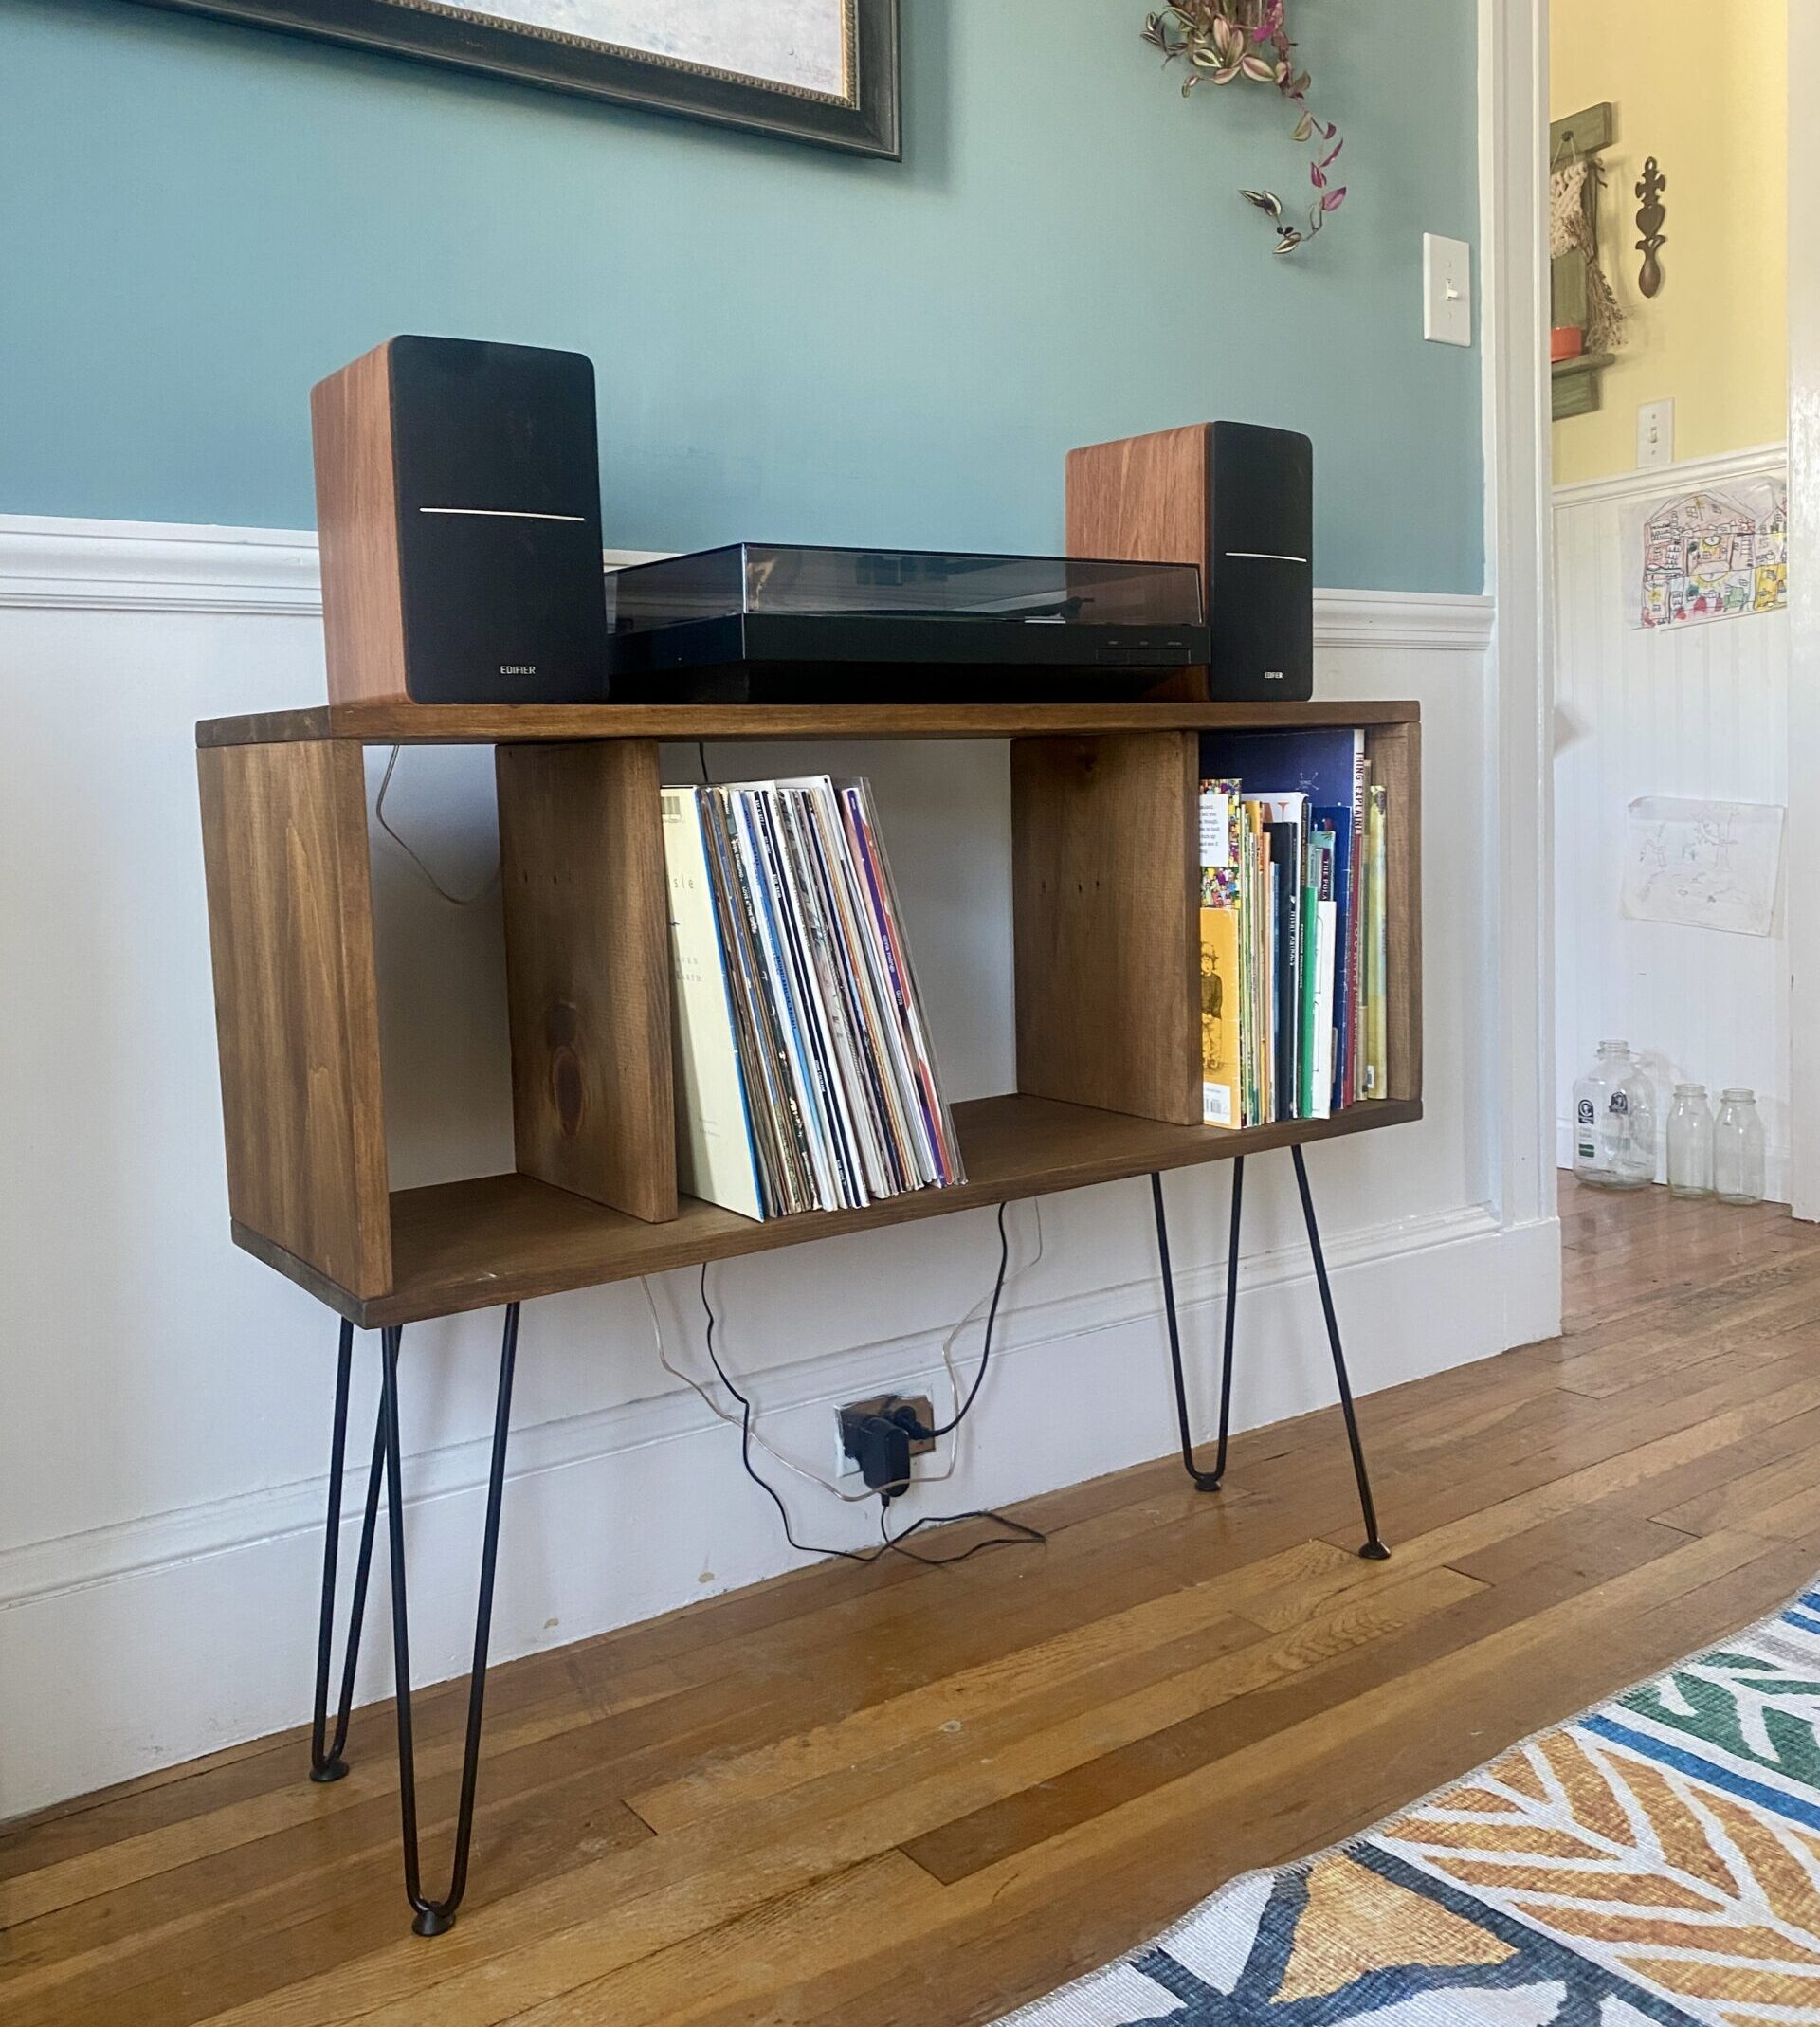
We’ve needed some kind of stand for our turntable and records, and couldn’t find anything we liked on Marketplace, and didn’t want to spend $100+ for some particle board junk. So I built this mid-century modern-style record player stand over the weekend. It’s a super simple DIY project! Read on for the tutorial – but first, it’s also a good reason to share one of my favorite woodworking tips.
Using relative measurements
I’ll be honest, I’m terrible at measuring things. I “measure twice, cut once,” just like the old adage says to, yet I always seem to screw it up, even after all these years. And I work with a lot of leftover scrap wood of weird sizes, which doesn’t help matters. So I’ve adopted a little hack: Most of my DIY projects just use relative lengths.
What do I mean? A lot of woodworking plans come with cut lists — e.g., cut four 2×4’s to 31-5/8″ or something very specific like that. But with few exceptions, you don’t need your table legs or other boards to be exactly a certain length; you just need them to match each other.
Within certain bounds — like if you’re trying to fit the piece into a small space or through a doorway, or need it tall enough to store something specific, like 12.5-inch vinyl records — the exact dimensions of your project don’t truly matter, do they? Does it make any difference whether a table is 30-5/8″ inches tall or 31-1/16″ inches tall? No.
What does matter is that all four legs are the exact same length.
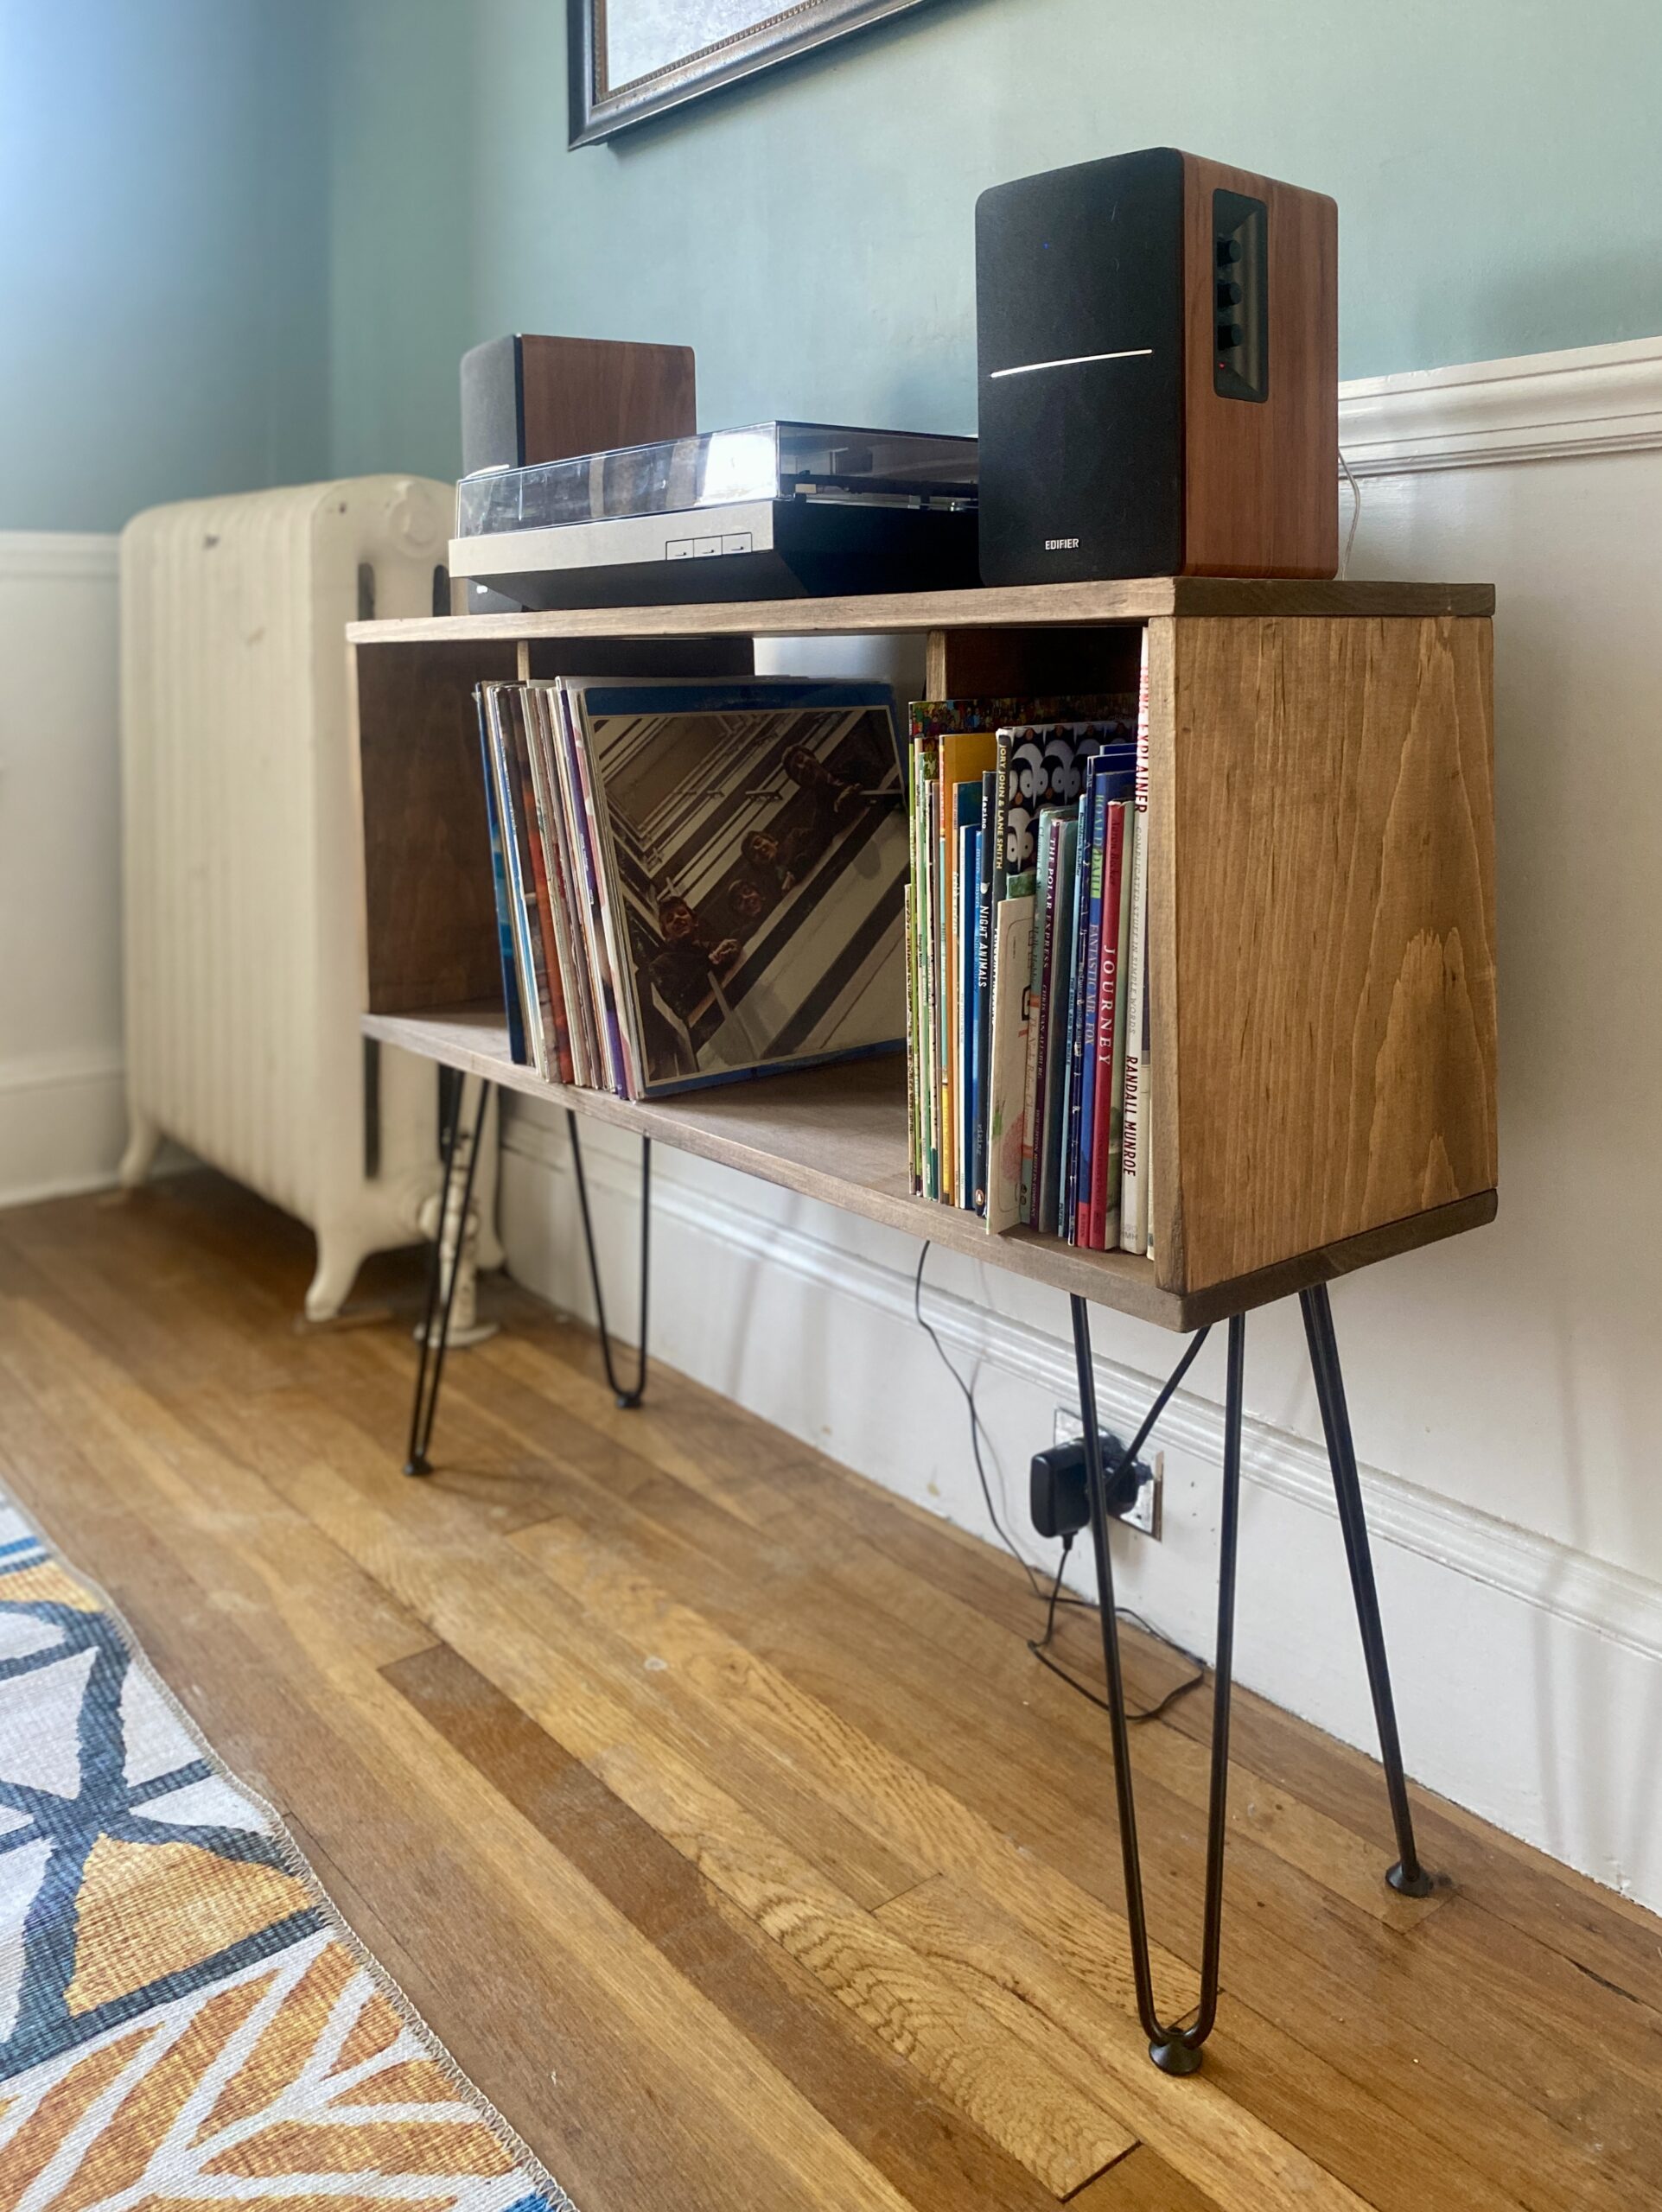
For this project, I had one basic requirement: The cubbies needed to be at least 13 inches tall to store our vinyl records. Whether they were 13″ exactly, or 13-3/8″ or 13-11/16″ didn’t really matter. I just needed the four vertical pieces to be a) at least 13″ tall and b) exactly the same height.
So I measured the first one to be about 13-1/2 inches, giving myself some room for error, and cut it with the chop saw. And then I just used that piece as the measuring unit for the other three, stacking the first board on top of the longer one, butted both ends up flush together, and then drew a line where it ended and cut there.
If, after you’ve got four pieces, one or two are still a little longer or shorter, you can stack all four on top of each other and trim off the last 1/8 inch or so from the entire stack: Just line them up flush on one end, chop the saw straight down through all four pieces at the other end, and they’ll be perfectly even. Voila!
Likewise, I didn’t really care if the record player stand came out to be exactly 39 inches wide, or 40 or 37. I just wanted it roughly that long. So I aimed at 39 inches but mostly just made sure the two pieces were an exact match by using the first cut board as the measuring unit for the second.
How to make this DIY record player stand
To build this DIY record player stand, start with two long 1×12’s of matching lengths (roughly 39 inches), and four shorter matching pieces (roughly 13 inches), which will be the sides and dividers. If you like a proper cut list, here’s what you’d use:
- Top and bottom: Two 1×12 pine boards, cut to 39 inches
- Sides: Two 1×12 pine boards, cut to 13.5 inches
- Dividers: Two 1×10 pine boards, cut to 13.5 inches (or use 1×12’s, I just ran out of the wider ones)
Choose a configuration.
Next you can decide how you want to configure those dividers. I dry-fit the boards together to help me visualize a couple of different layouts before settling on the last one:
Next, secure the sides to the bottom piece.
Flip the whole thing over, and balance the bottom on top of the two side pieces — paying some attention to which sides are facing front vs. back, if there’s a nicer looking side to the wood.
Line up the corners nice and even, then tap a couple of finish nails into each side to hold everything in place for the moment.
Drill pilot holes from the bottom into the side pieces (2-3 on each side), then fasten them together with 1-1/2 or 2-inch screws. These won’t be visible, since they’ll end up on the bottom of the record stand.
After that, it’s time to attach the top, using a dowel to hide the screw holes.
Flip it back over and balance the top board on top of the sides. Once again, line up the corners and tap in a couple of finish nails to hold everything steady.
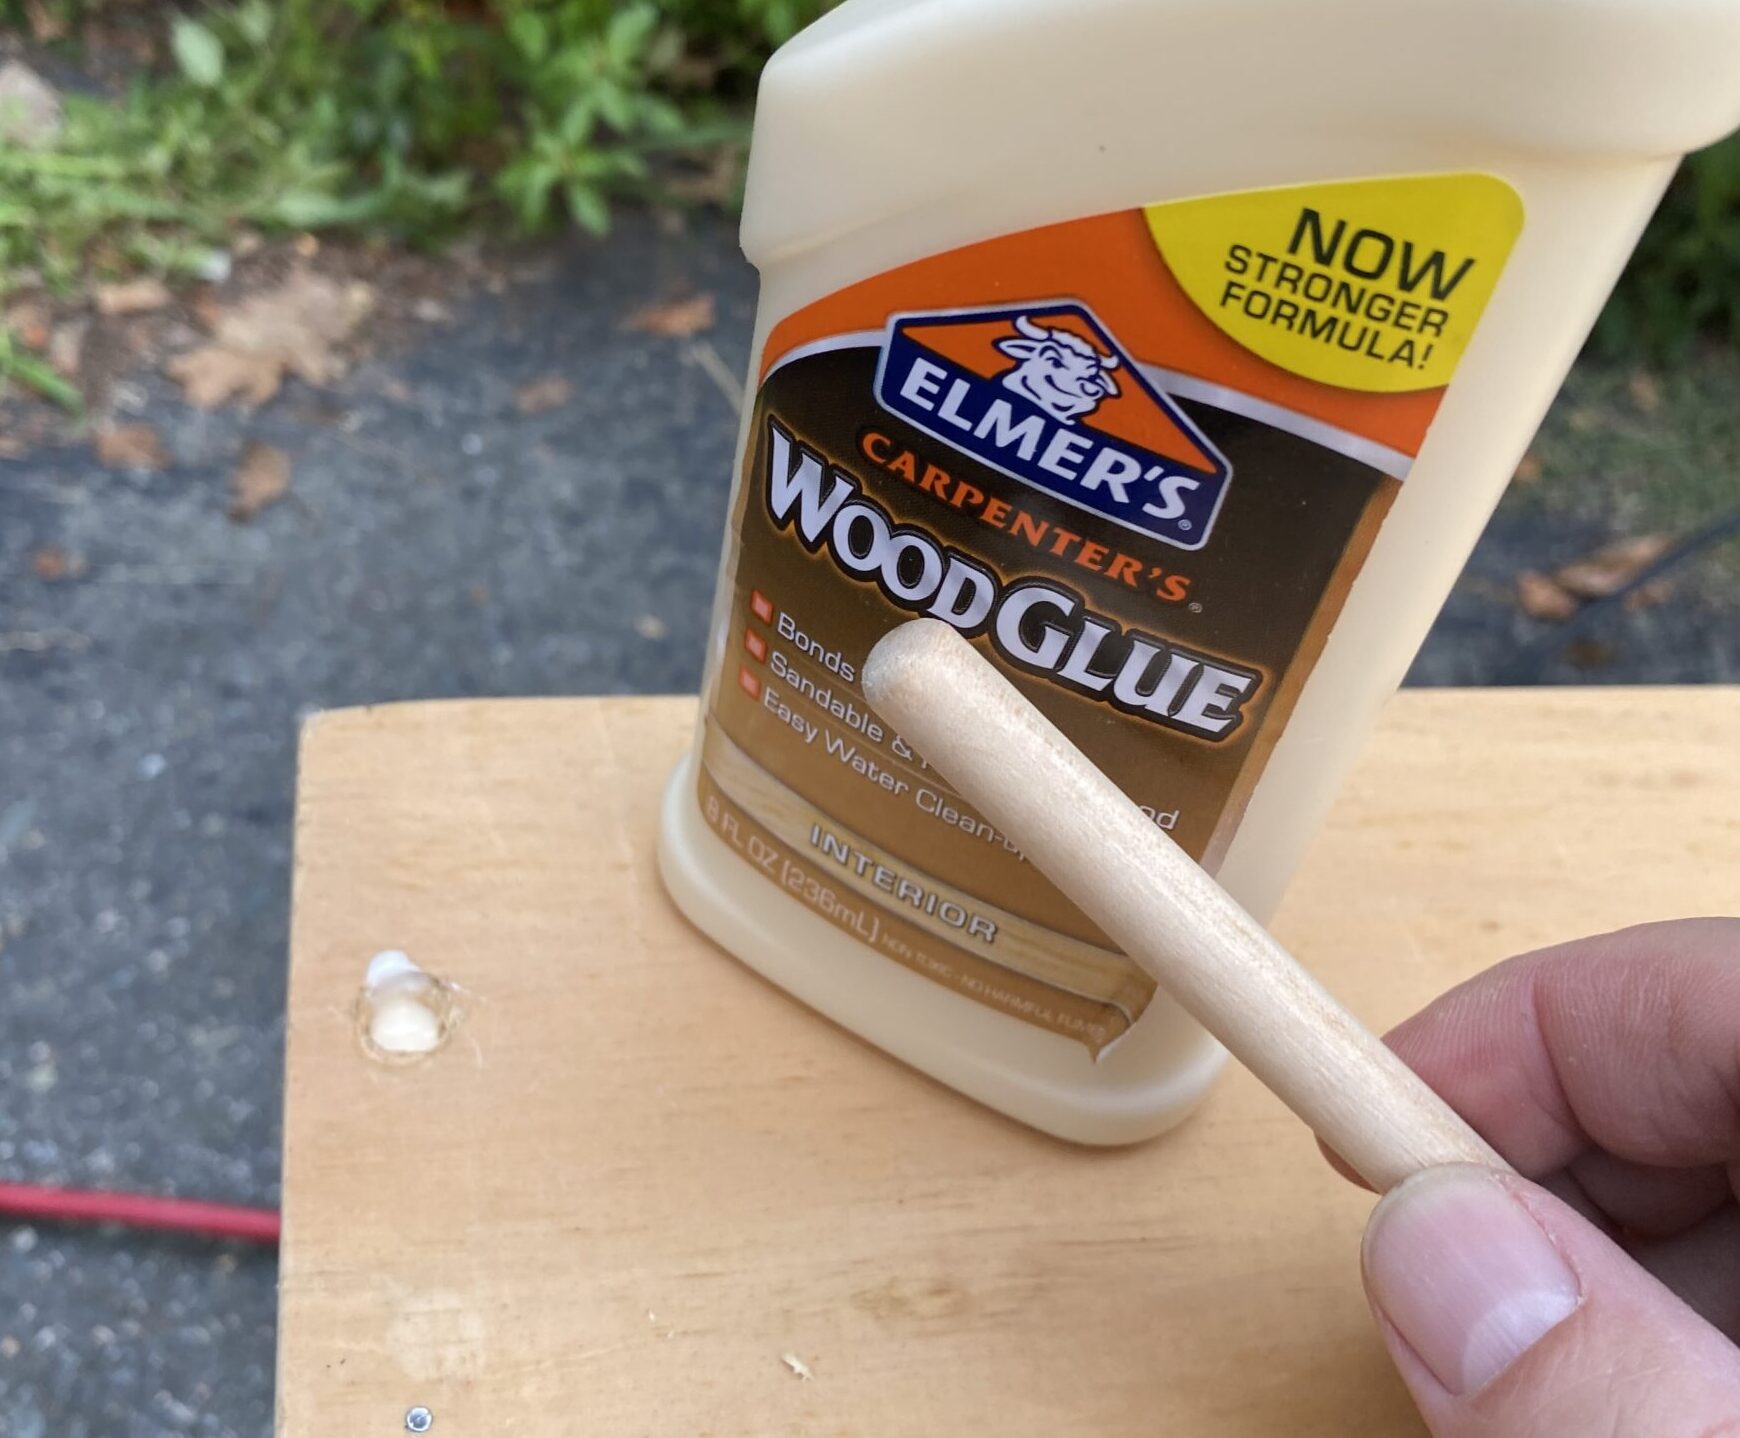
Since this part of the record stand is visible, it’s nice to hide the screws if you can. (If you don’t mind seeing them, you can just repeat the process of drilling pilot holes and securing the top to the sides with screws.) But to make it look more professional, I plugged the screw holes with wood dowels. Here’s how to do that:
Use a 3/8″ drill bit to make a pair of half-inch deep holes on each side, and then drill pilot holes in the center of each of those.
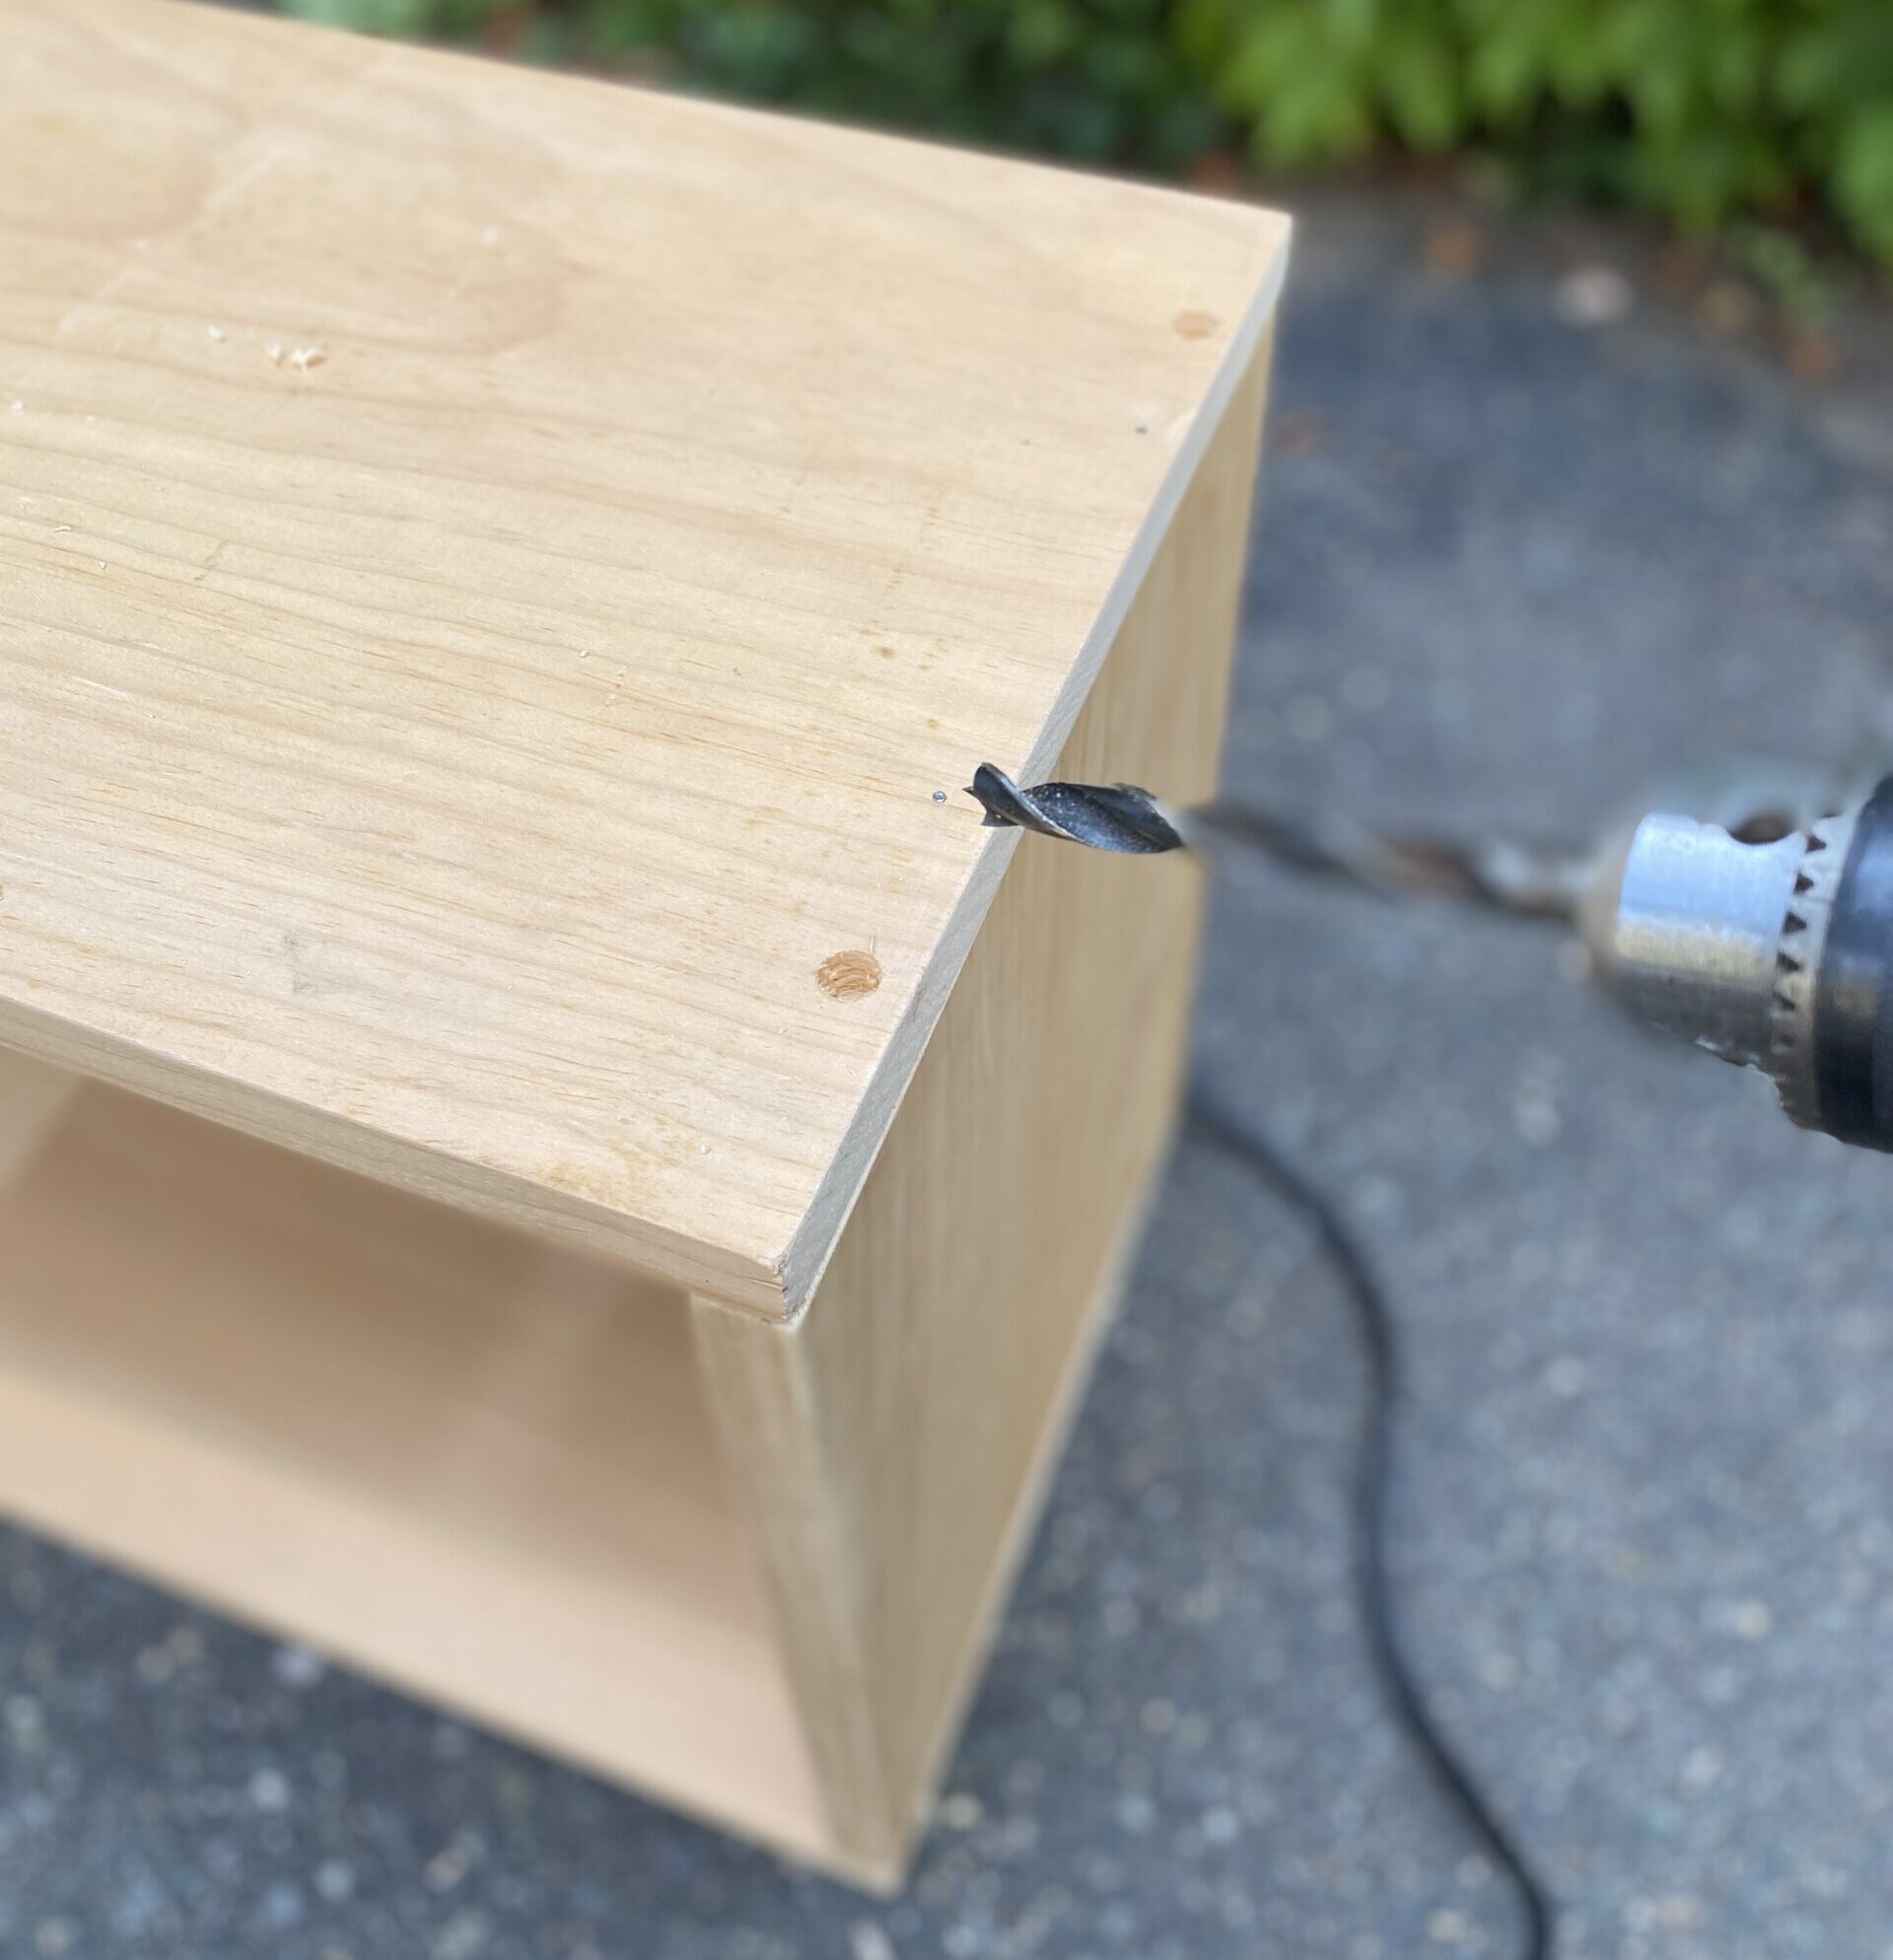
After securing the top to the sides by drilling 1-1/2-inch screws into each of those holes, repeat this process for each of the four corner holes:
First, apply wood glue to the hole.
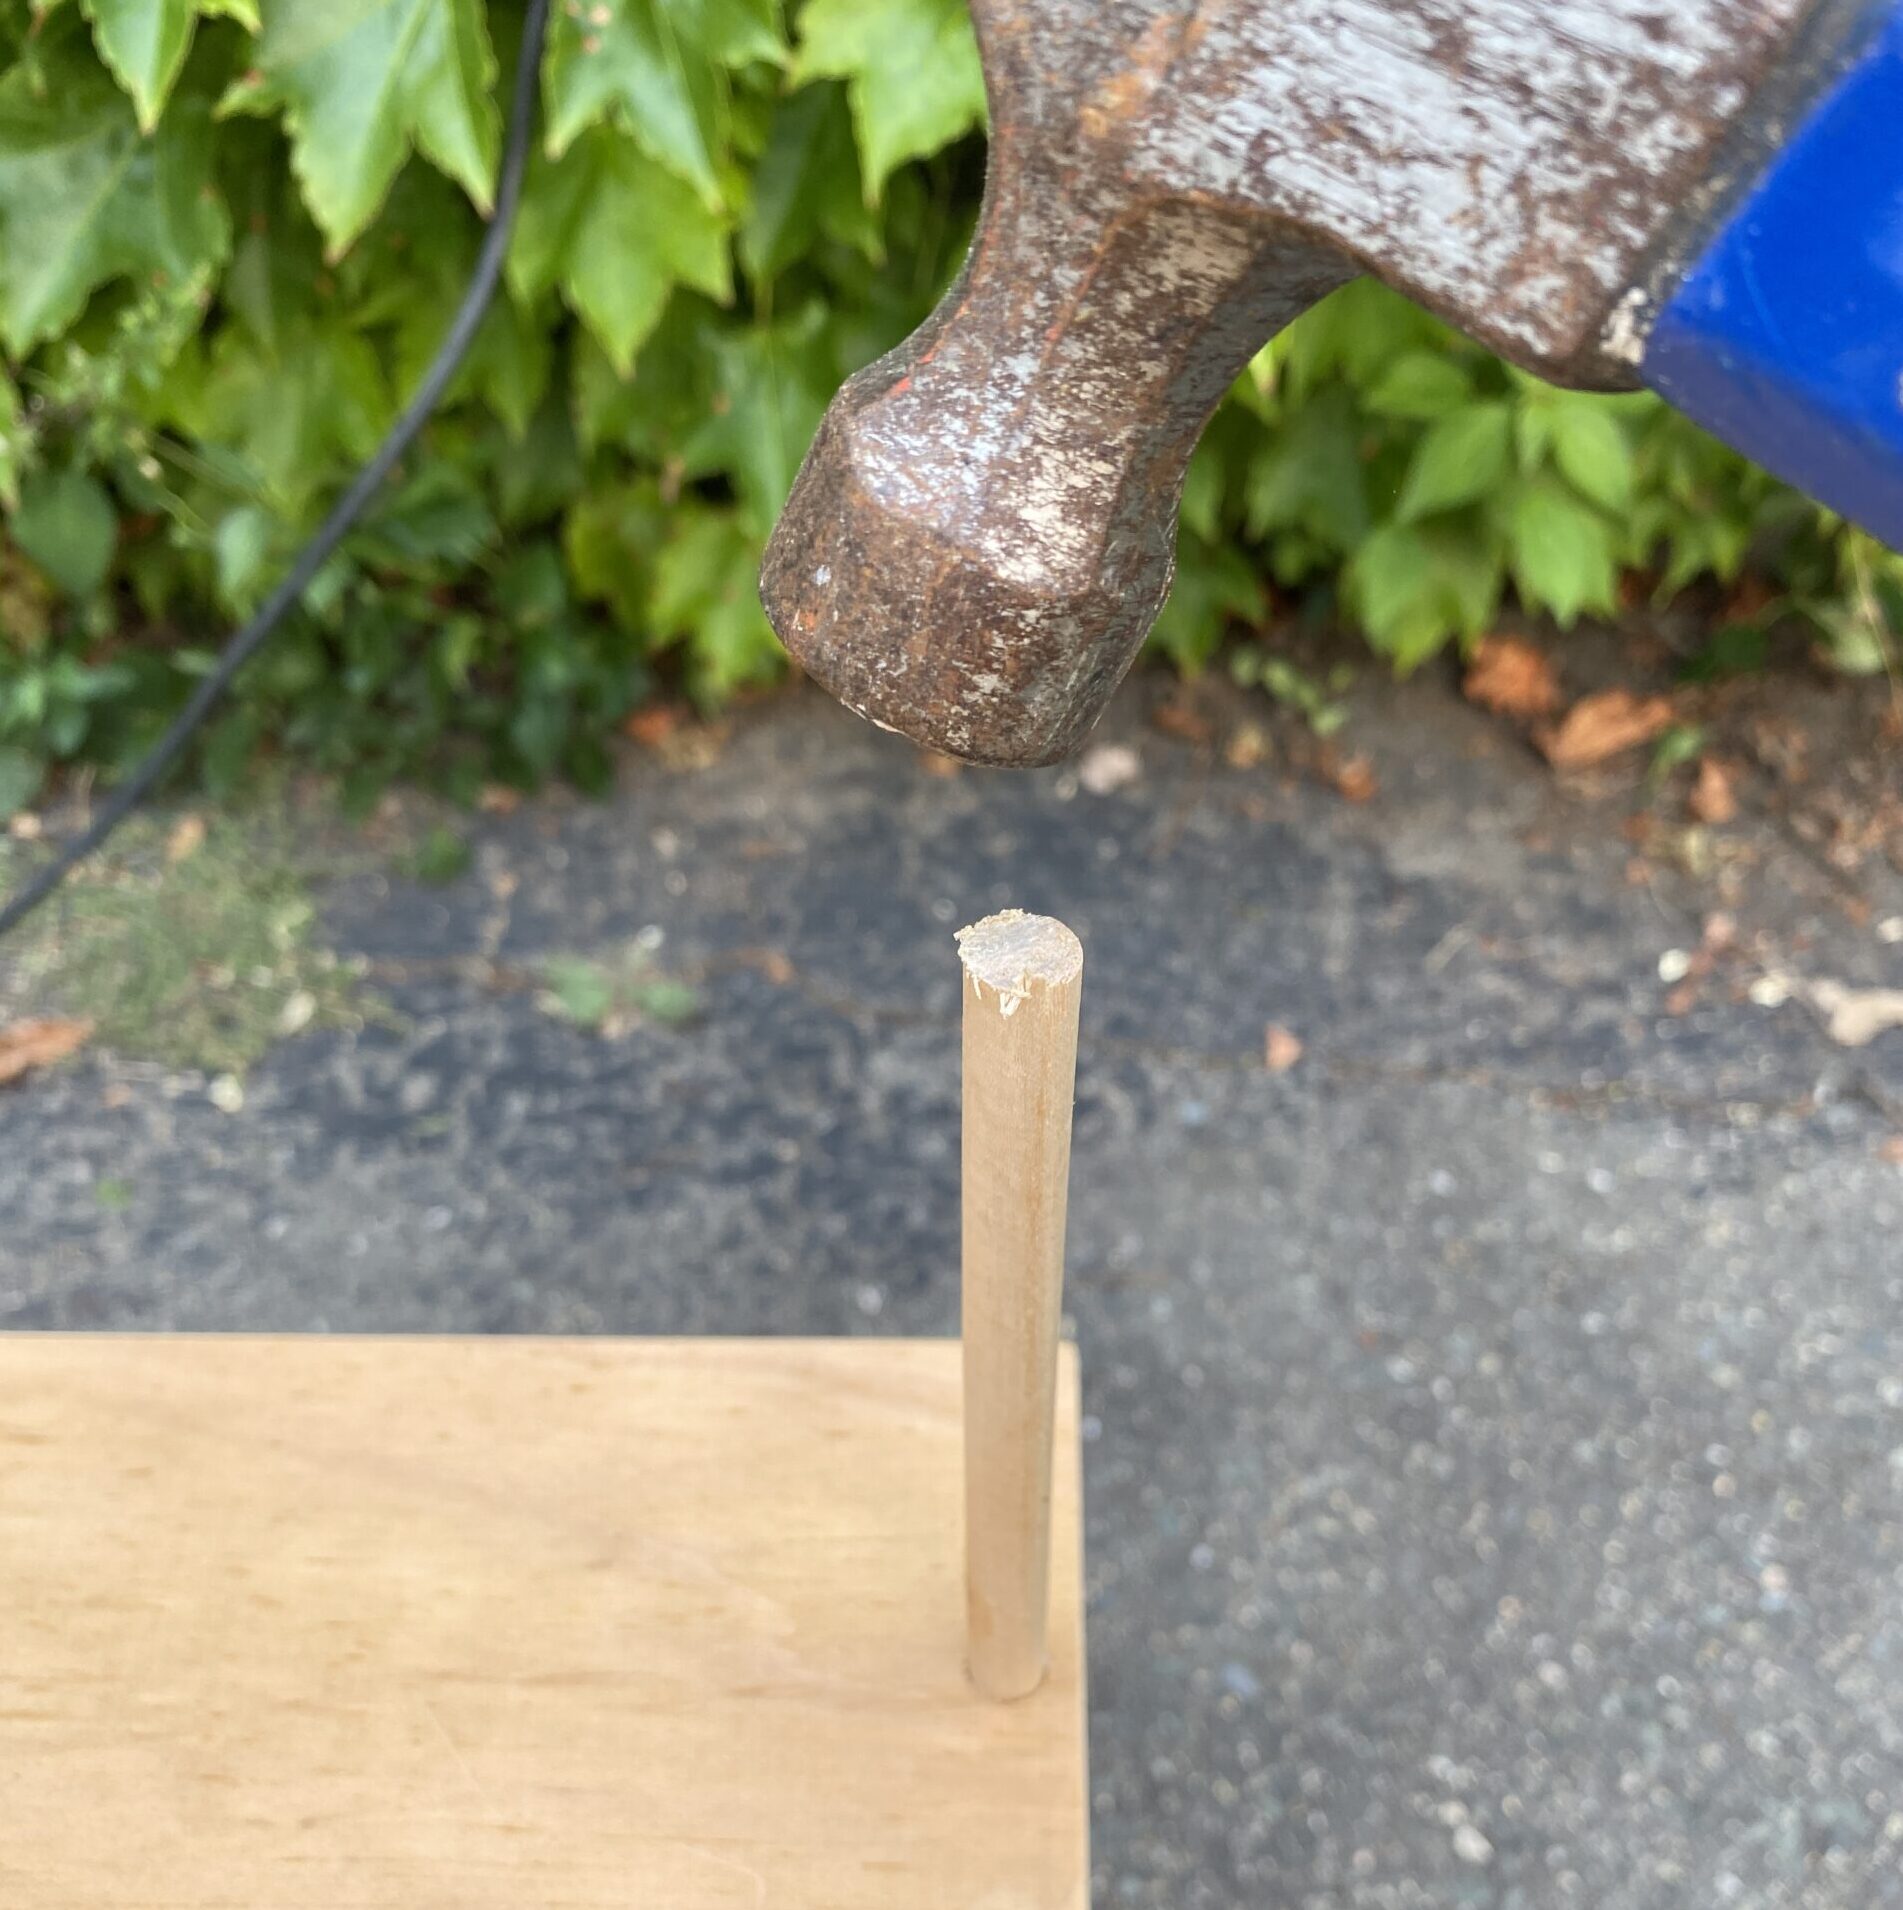
Then use a hammer to tap a 3/8″ wood dowel firmly into the hole. (You can use one dowel for all four.)
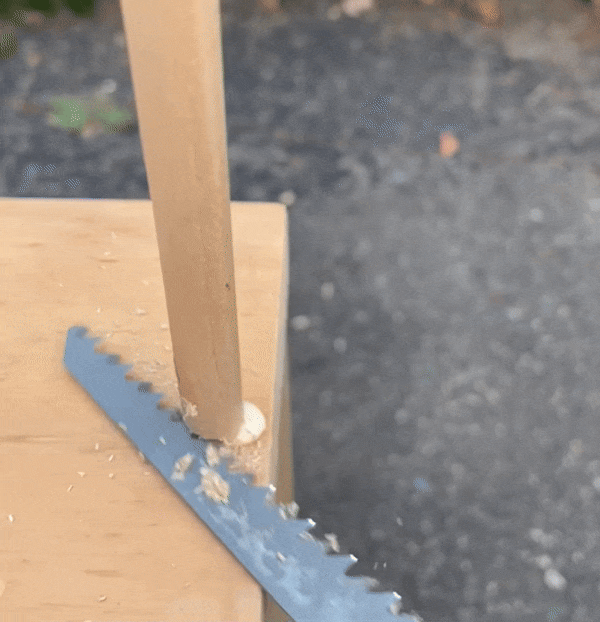
Use a handsaw to cut the dowel flush with the board surface.
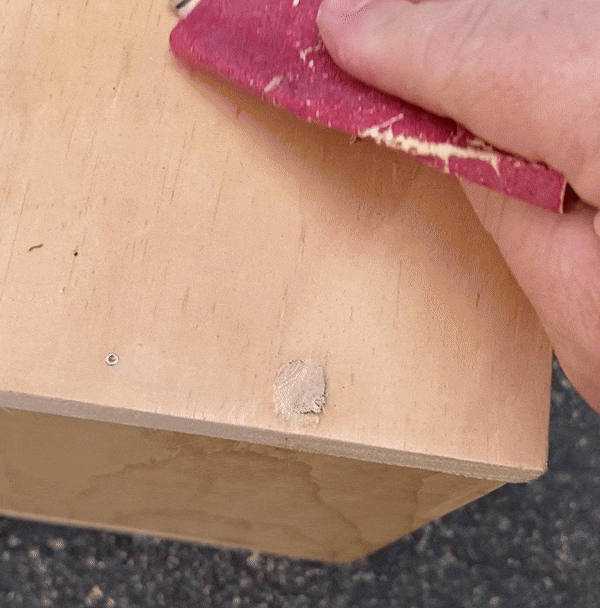
Wipe off any excess glue, and then sand the area well, until it feels nice and smooth when you run your hand over the plugged hole.
Install the dividers.
The hard stuff is done! Installing the dividers is a cinch. Measure out where you want each one, and just tap it gently into place.
Measure front and back and top and bottom to make sure they’re not crooked or anything — I placed mine 8 inches from either side — and then you can just tap in some finish nails on the top and bottom to secure them into place.
Stain it.
Any stain is going to look great, to be honest, but living in New England, I’m partial to Early American. Slather it on against the grain, and let it sit for a few minutes, then wipe it off with a clean rag. Repeat after 2 hours for a darker finish.
Attach the legs.
The metal hairpin legs are what really give this DIY record player stand its mid-century modern look. They’re surprisingly easy to find — at Rockler, big box hardware stores, even Amazon (affiliate link) — and just as easy to install.
I chose 16″ legs. After the stain had dried overnight, I flipped the table over, and screwed them in about 1.5 inches from the edge in each corner.
Last step: Spin some vinyl!
Related posts:


Jon Gorey • August 12, 2025