
Weekends are the perfect time (often the only time) to tackle the DIY and home improvement projects you've been planning. Just be careful not to bite off more than you…
1

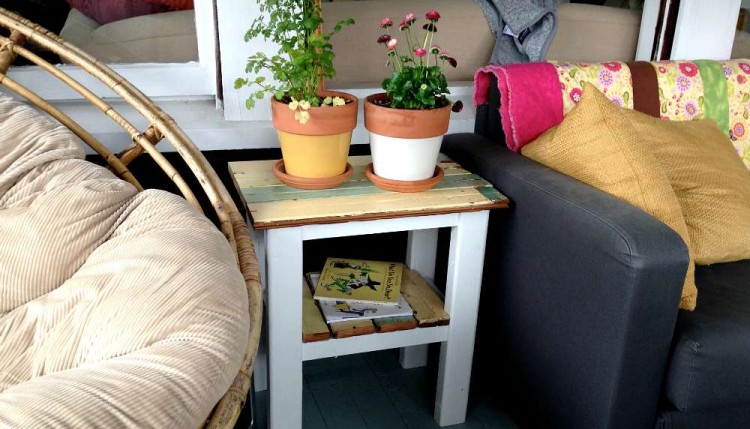
How to build a rustic DIY end table from reclaimed wood
I’ll admit it: I’m a garbage picker.
On Sunday evenings I like to go for a jog or a walk through the neighborhood, and it just so happens that Monday is trash day. And honestly, people throw out a lot of good stuff!
Now, my wife likes a clutter-free (not to mention trash-free) house, and I’m on foot anyway, so I probably leave behind 97% of the things that catch my eye. But in spring and summer, people are always tossing old wooden boards — maybe they replaced their deck or an old fence, put in new flooring, or finally got around to cleaning out their garage.
That’s the stuff I take home.
Yep — I scoop up a bunch of old wooden boards from someone’s trash pile, and jog home with them under my arm like some kind of weirdo!
The thing is, these boards have character you can’t buy at Home Depot or Lowe’s: faded paint, nail holes, weathered grain. If I were more awesome, I’d spend my afternoons in Vermont or Upstate New York helping people take down their rickety old barns in exchange for some of that beautifully distressed wood. I’d probably wear rugged flannel shirts, too. But for now, I’m a city kid, and Quincy’s curbside trash treasure is my old Vermont barn.
So what can you do with these old boards? They’re great for making picture frames, benches, and tables, all of which are pretty simple DIY projects if you don’t get carried away. Today, we’ll look at a small end table I made this spring using someone’s old front porch.
Materials for a DIY end table:
- Old decking or other reclaimed boards
- 8-foot 2×3″ stud for the legs (1)
- 12-foot 1×2″ strapping for the apron and supports (1)
- Drill and 1.5-inch screws
- Circular saw or miter saw
- Pocket-hole jig (optional)
- Clamps and wood glue
Step by step
Plan: Before you get started, try to visualize the entire project. Figure out how long, wide, and high you want the table to be, and how you can configure your reclaimed boards into a tabletop that fits those dimensions. This table is 13″ x 19″ and stands about 21″ tall.
Step 1: Use your saw of choice to cut the 2×3 stud into four 20-inch legs. Then cut the 1×2 strapping into four 12-inch lengths and six 8-inch lengths. (These measurements don’t matter too much, as long as they match each other — for instance, you could cut the strapping into 15-inch and 10-inch segments for a larger table.)
Step 2: Use a pocket-hole jig to drill angled pilot holes into the bottom corners of all the 1×3 boards. This is to conceal the screws a bit as we join these boards to the legs.
Pocket holes are inset and drilled at an angle, allowing you to join two pieces of wood together with concealed screws. (Photo: Home Depot)
Alternates to step 2: If you don’t have a pocket hole jig, you can fudge it, but it’s tricky: With a 3/8″-inch drill bit, drill a hole at an angle, being careful to not to go all the way out the end of the board. Follow that with a small pilot hole the rest of the way, out the side of the board.
OR you could also use dowels and wood glue to make the joints instead. If you’ve assembled any Ikea furniture — where you tap a small, round piece of wood into a pre-drilled hole — you’ll be familiar with the concept, but it takes precision to line up the holes correctly if you don’t have a special jig for it. Drill a 3/8″ hole about a half inch deep on the support, and drill another 3/8″ inch hole on the leg so it lines up exactly. Squeeze a little bit of wood glue in both holes and tap in a 3/8″ inch dowel to join the two pieces together.
OR you can simply join the boards from the outside in using screws, in which case you’ll see the screws. If you use fancy hardware, that might actually look quite nice — otherwise just paint over them, or countersink the screws (this means using a drill bit that carves out a little divot for the head of the screw) and plug the divots with wood filler afterward. Then sand and paint.
Step 3: In two of the 8-inch pieces and two of the 12-inch pieces (the apron pieces), drill a pair of 3/8-inch wide holes a few inches apart, straight up from the bottom edge, about halfway into the board. These holes will hide the screws we use to attach the tabletop later.
Step 4: Attach the apron and support boards to the legs with screws as shown. Keep the sides with the holes facing down, and make sure the apron boards (the top supports) are flush with the top of the legs. The supports can go as high up on the legs as you like, as long as they’re all at the exact same height. I think I put these seven inches from the bottom of the legs.
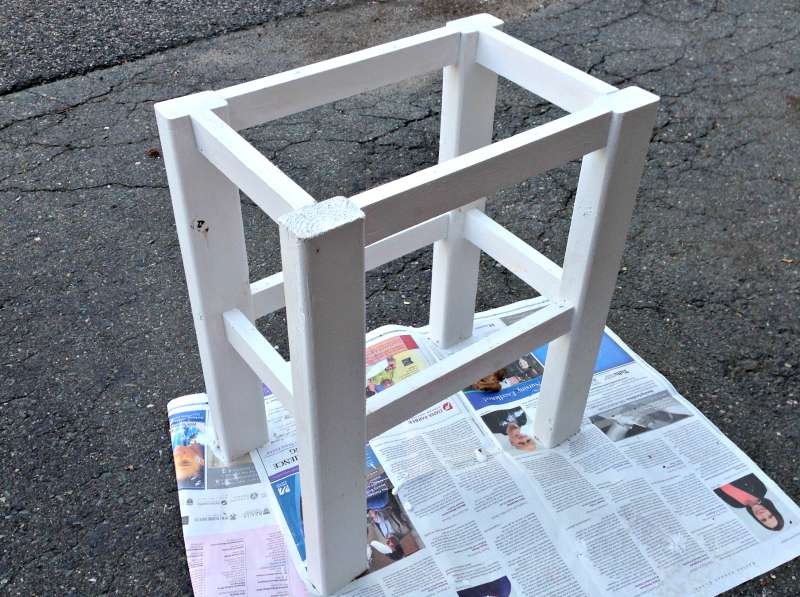
Step 5: Prime and paint (or stain, if that’s your scene) the frame.
Step 6: Time to prepare the tabletop. Cut your boards to the desired length and fit them together snugly — then flip it all upside down. Remember, each board has some personality, so make sure they’re in an arrangement you like. I even let one board go a little long, because a) I screwed up, and then b) I decided I liked the rough-edged look of it.
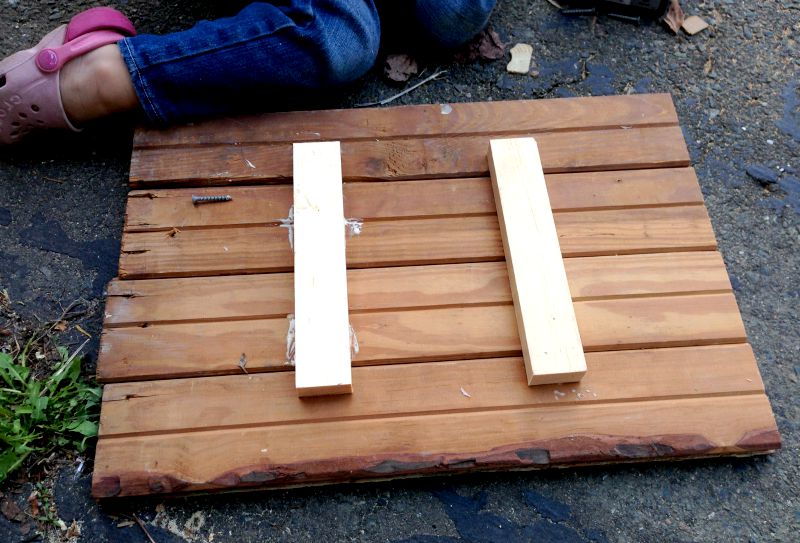
Step 7: Fasten them together using the remaining 8-inch pieces of the 1×2 strapping, centered as shown. I glued these down first, and then secured them with screws in a staggered pattern (drill pilot holes first to avoid splitting the wood). Make sure, of course, not to drill through to the other side — the top of the table — and that the screws are not so long they poke through!
Step 8: Now it’s time for the grand finale: attaching the tabletop. Plop it onto the frame and center it so there’s a couple of inches of overhang in all directions. Clamp it down in a couple of spots. (Clamps are one of those essential must-have tools!) Then fasten the top to the aprons by drilling screws into the top — through those half-drilled holes we hollowed out earlier.
If you have a nice flat work surface, this step works better upside down; but if you have a lumpy, crappy driveway and a three-year-old rummaging through your tools, just leave it upright and do the best you can!

Step 9: You can stop there, or you can add a second shelf-like surface that rests on the lower supports. I had just enough of the old decking left over after my initial cuts to make this work, so I treated it as a second, smaller table top (with one strip of strapping underneath it) and then screwed it into place. I used a jigsaw to notch out the corners so it would fit snugly.
And there you have it. The whole thing cost me about $12: two boards from the hardware store and some scrap wood from the side of the road. Well, I guess it also might have cost me a bit of dignity, as my neighbors probably wondered why that man was running off with their garbage!
Related posts:


Jon Gorey • July 16, 2015
Comments
Comments are closed.