
Our daughter's always been a climber. She scales fences, trees, door frames —anything— and she loves going to the climbing gym. Since that probably won't be happening during the stay-at-home…

How to make a tire swing: Stay-at-home summer, part 3
Playgrounds officially re-opened this week, but ours was a little crowded and crazy for our liking, so we’re still spending a lot more time in our yard. After installing monkey bars and a DIY rock climbing wall in the backyard, we turned our attention to the Norway maple tree out front — and thought about how to make a tire swing.
I’ll be honest, this was almost as much for me as for the kid. When we were house hunting over a decade ago, years before she was born, I paid special attention to whether a house had a big stately tree on the property that could one day hold an old-fashioned tire swing. There’s just something about them I find so nostalgically rustic and beautiful.
More importantly, though, for the purpose of our stay-at-home summer, they’re also a lot of fun for kids! Here’s what you’ll need to make your own tire swing at home:
Materials
- A sturdy tree limb: You want a branch that’s at least 6 inches thick, preferably thicker, and at least 8 feet up.
- An old tire: If you don’t have one lying around (we didn’t), a tire shop should be able to hook you up — after all, it’s illegal to dump tires in a landfill in Massachusetts, and it costs a bit of money to recycle them, so it’s a win-win for both of you. I called up Sullivan Tire in Quincy and the guy there was super nice and eager to help us out.
- About 15-25 feet of 1/2-inch rope: Polyester rope, the kind you’d use on a boat, is widely recommended for outdoor projects because it won’t rot or get mildewy after years in the rain. But I just couldn’t bring myself to introduce more plastic to the world when traditional manila rope is super strong and durable, made of natural, renewable hemp, and more rustic looking. (Some people complain that polyester and polypropylene ropes are too stiff and slippery, too.)
- Masking tape or lighter: If you’re using manila rope, you’ll need to wrap a section in masking tape before you cut it so the braids don’t unravel after you snip it. If using synthetic rope, you can do the same thing or melt the cut end with a lighter to fuse the strands together (probably not good to inhale those fumes).
- Sharp shears or knife: Half-inch rope is pretty tough stuff, and scissors may not cut it (literally). Keep the pruning shears or tree trimmer handy.
- Power drill: This is so you can make drainage holes in the tire.
How to make a tire swing
Step 1: Wash the tire.
Old tires have traversed some 60,000 miles on all types of roads, in all types of conditions, all while underneath your greasy car. They’re pretty gross.
We used plenty of car wash soap — Dawn also works well since it’s good at degreasing — and the highest pressure setting on our hose nozzle to wash, scrub, and power-rinse the tire a couple of times. Then have your assistant roll the clean tire into position under the tree.

Step 2: Toss the rope over the tree limb.
I wasn’t about (er, or able) to climb the tree or bother getting the step ladder out of the basement — I figured I could just toss the rope over the tree branch. How hard could it be?

Well, it took a few tries to be sure, but it was still worth it to keep my feet on the ground. (I saw a nice tip on BobVila.com, though: You can put a baseball in a sock, tie the sock to the end of the rope and toss that over the tree limb — the added weight makes it easier to throw accurately and will pull the slack section of rope down afterward to boot.)
Step 3: Tie a slipknot.
Take the two sections of rope and tie a slipknot. I’m no sailor, so I had no idea how to do that, but this diagram from 101knots.com got me through it:
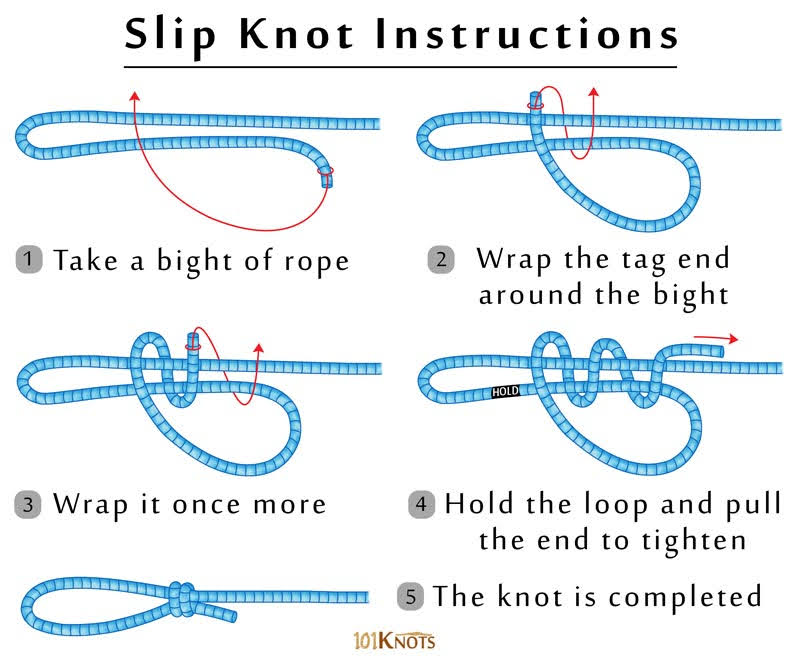
Pull on the longer, main section of rope to tighten the knot — it will slide up to the tree limb and then cinch up — and then give it a good tug and try hanging or swinging on it yourself to make sure it holds.
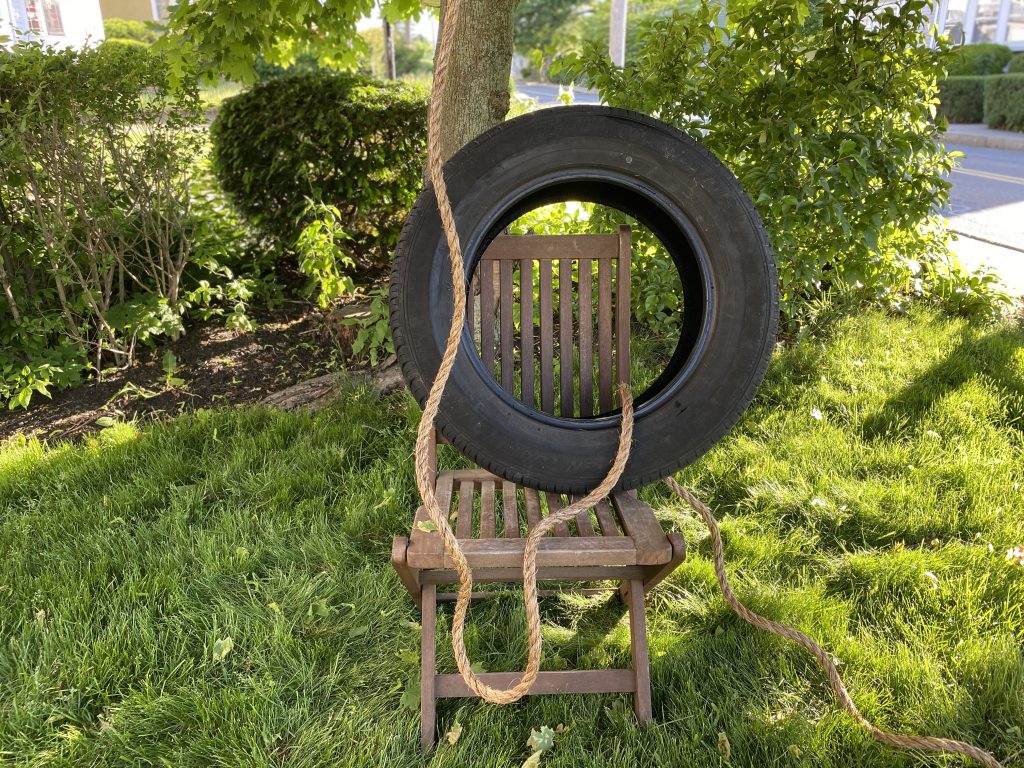
Step 4: Position the tire.
Tires are pretty heavy, so I’d recommend using a chair, recycling bin, or whatever else you have handy to prop it up so you’ll have an easier time securing it to the rope.
The rope will slacken a little bit as the knot tightens in the next step, so prop it up slightly higher than you ultimately want the tire swing to rest.
Step 5: Tie a square knot around the tire.
Wrap the rope around the tire once or twice, and then cinch it at the top with a square knot. There are very few knots I know by heart, but this is one of them: Left over right, right over left. Easy-peasy!
Step 6: Drill holes in the bottom.
You don’t want rainwater pooling in the tire and attracting mosquitos. Now that you know which part of this infinite circle is officially the bottom, drill a few 1/4″ holes in the very bottom so water can drain out. Check them periodically to make sure they haven’t clogged with leaves or other gunk.
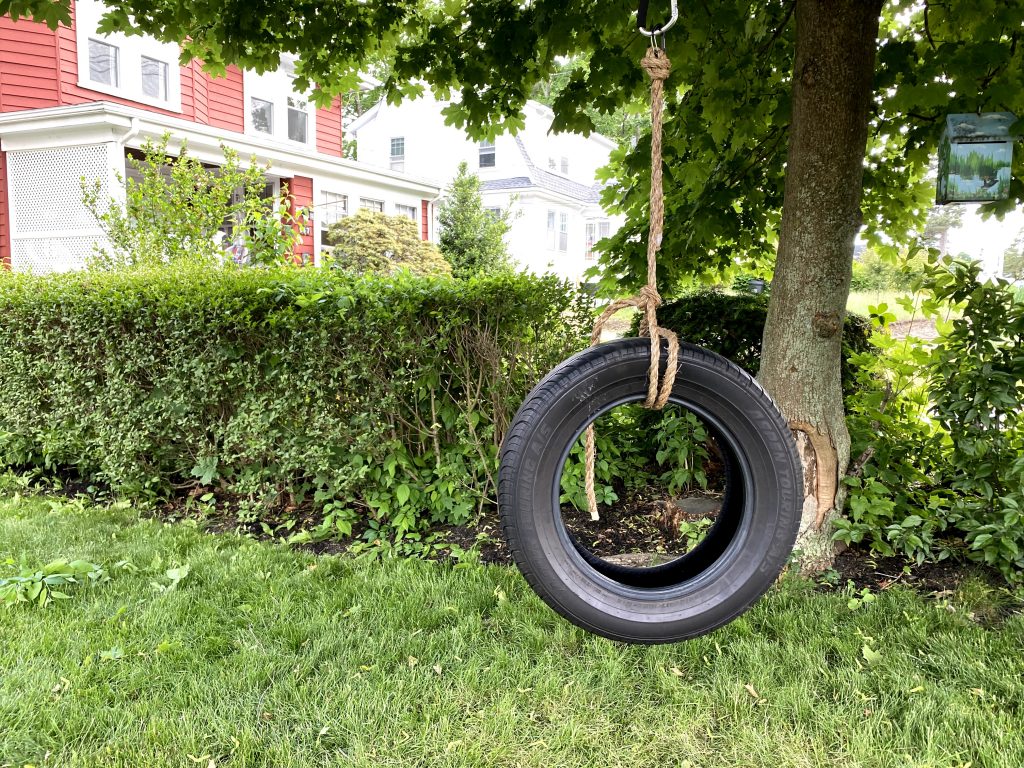
Step 7: Swing!
Trim any excess rope if you want, climb on yourself to make sure it still holds (the sound of squeaking rope is fine — cracking wood is not!), and then let your assistant have at it!

PS: You might notice I added a wholly unnecessary step and feature to this. We had a huge carabiner lying around, and I thought it might be cool to use that as a sort of junction hook — so that we can temporarily unclip the tire swing if we want to and replace it with a hammock-style swing chair, should we ever buy one:

It made things slightly more complicated — two extra knots, so I’m basically a sea captain now — but it might come in handy one day!
Related posts:
Jon Gorey • June 11, 2020